 红帽 Satellite6.10
调配主机 satellite 调配主机(pxe)
- 安装额外 capsule2 用于提供 pxe 服务(capsule2.linuxone.in)
- 提前同步 kictstart 存储库,发布并推送到 capsule 所在的 lifecycle env
- 配置 Hosts > Provisioning Templates 配置模板
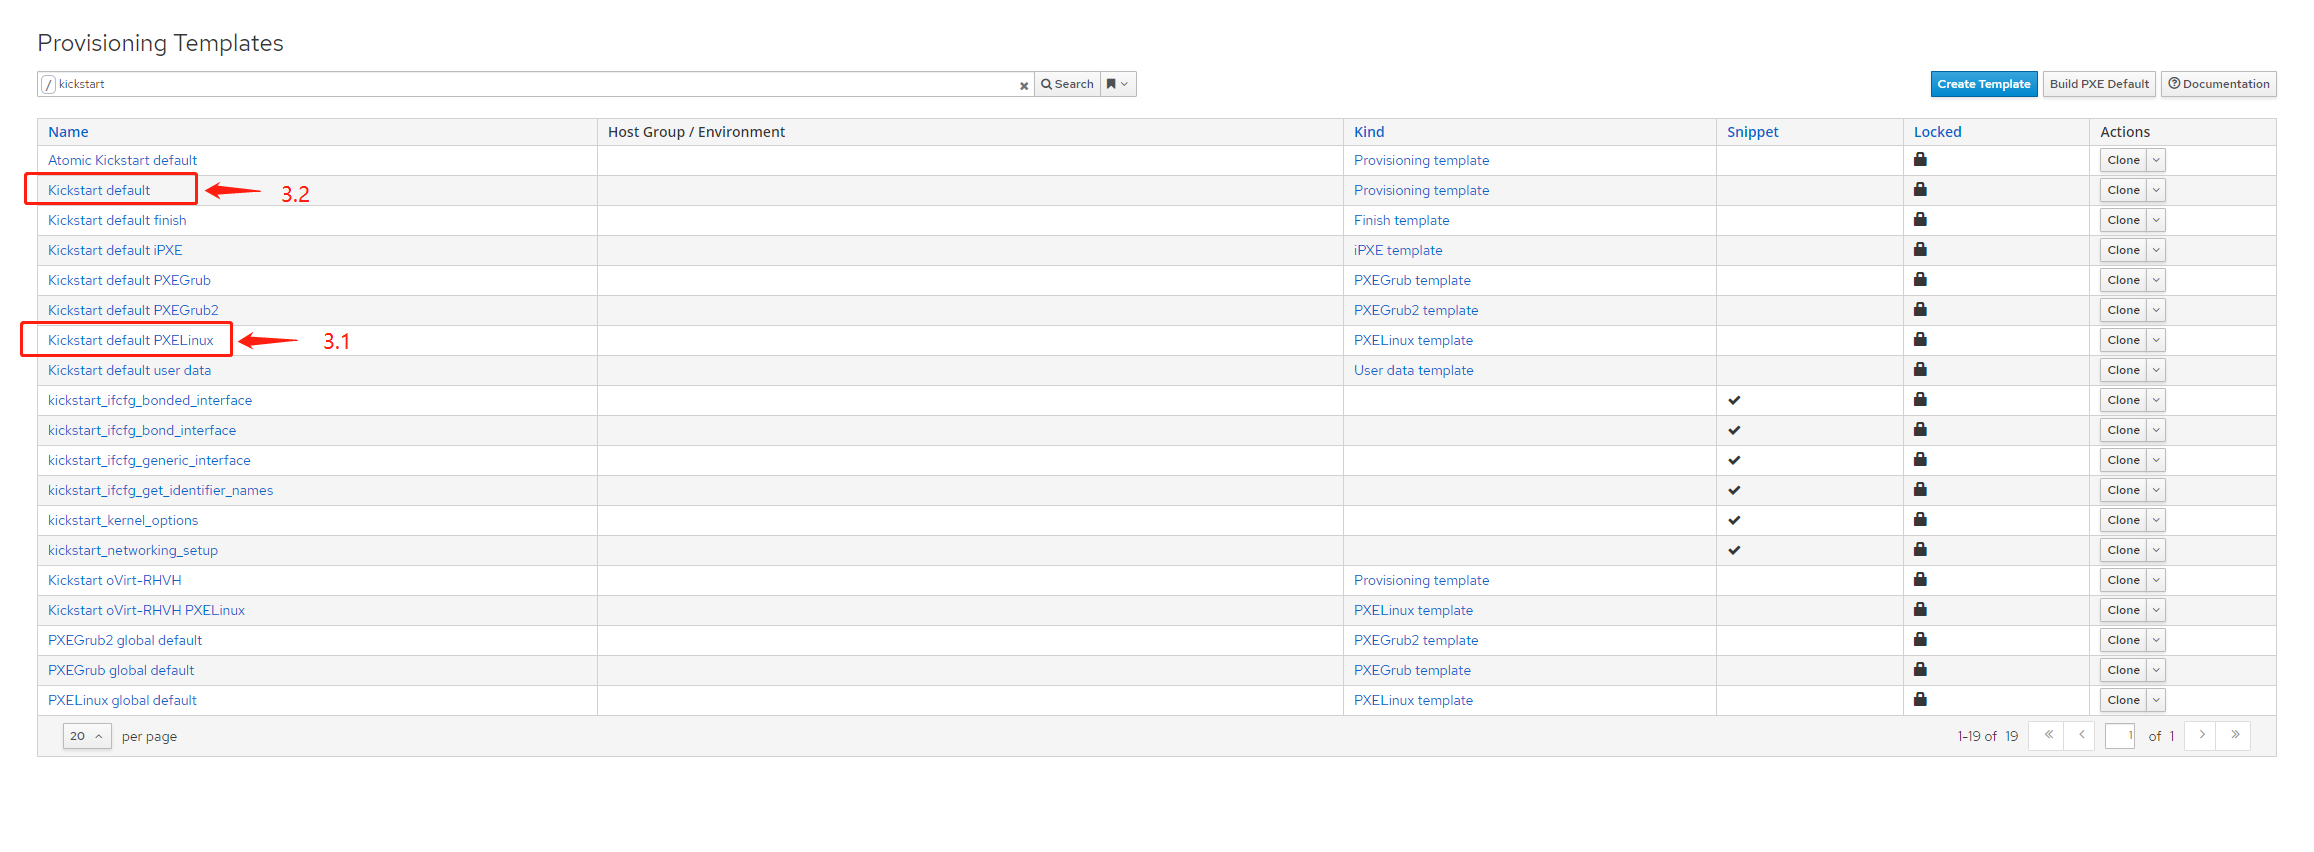
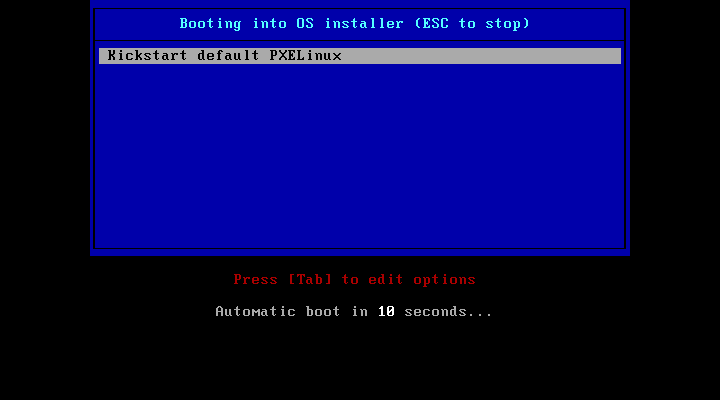
- 3.1 点击 Kickstart default PXELinux
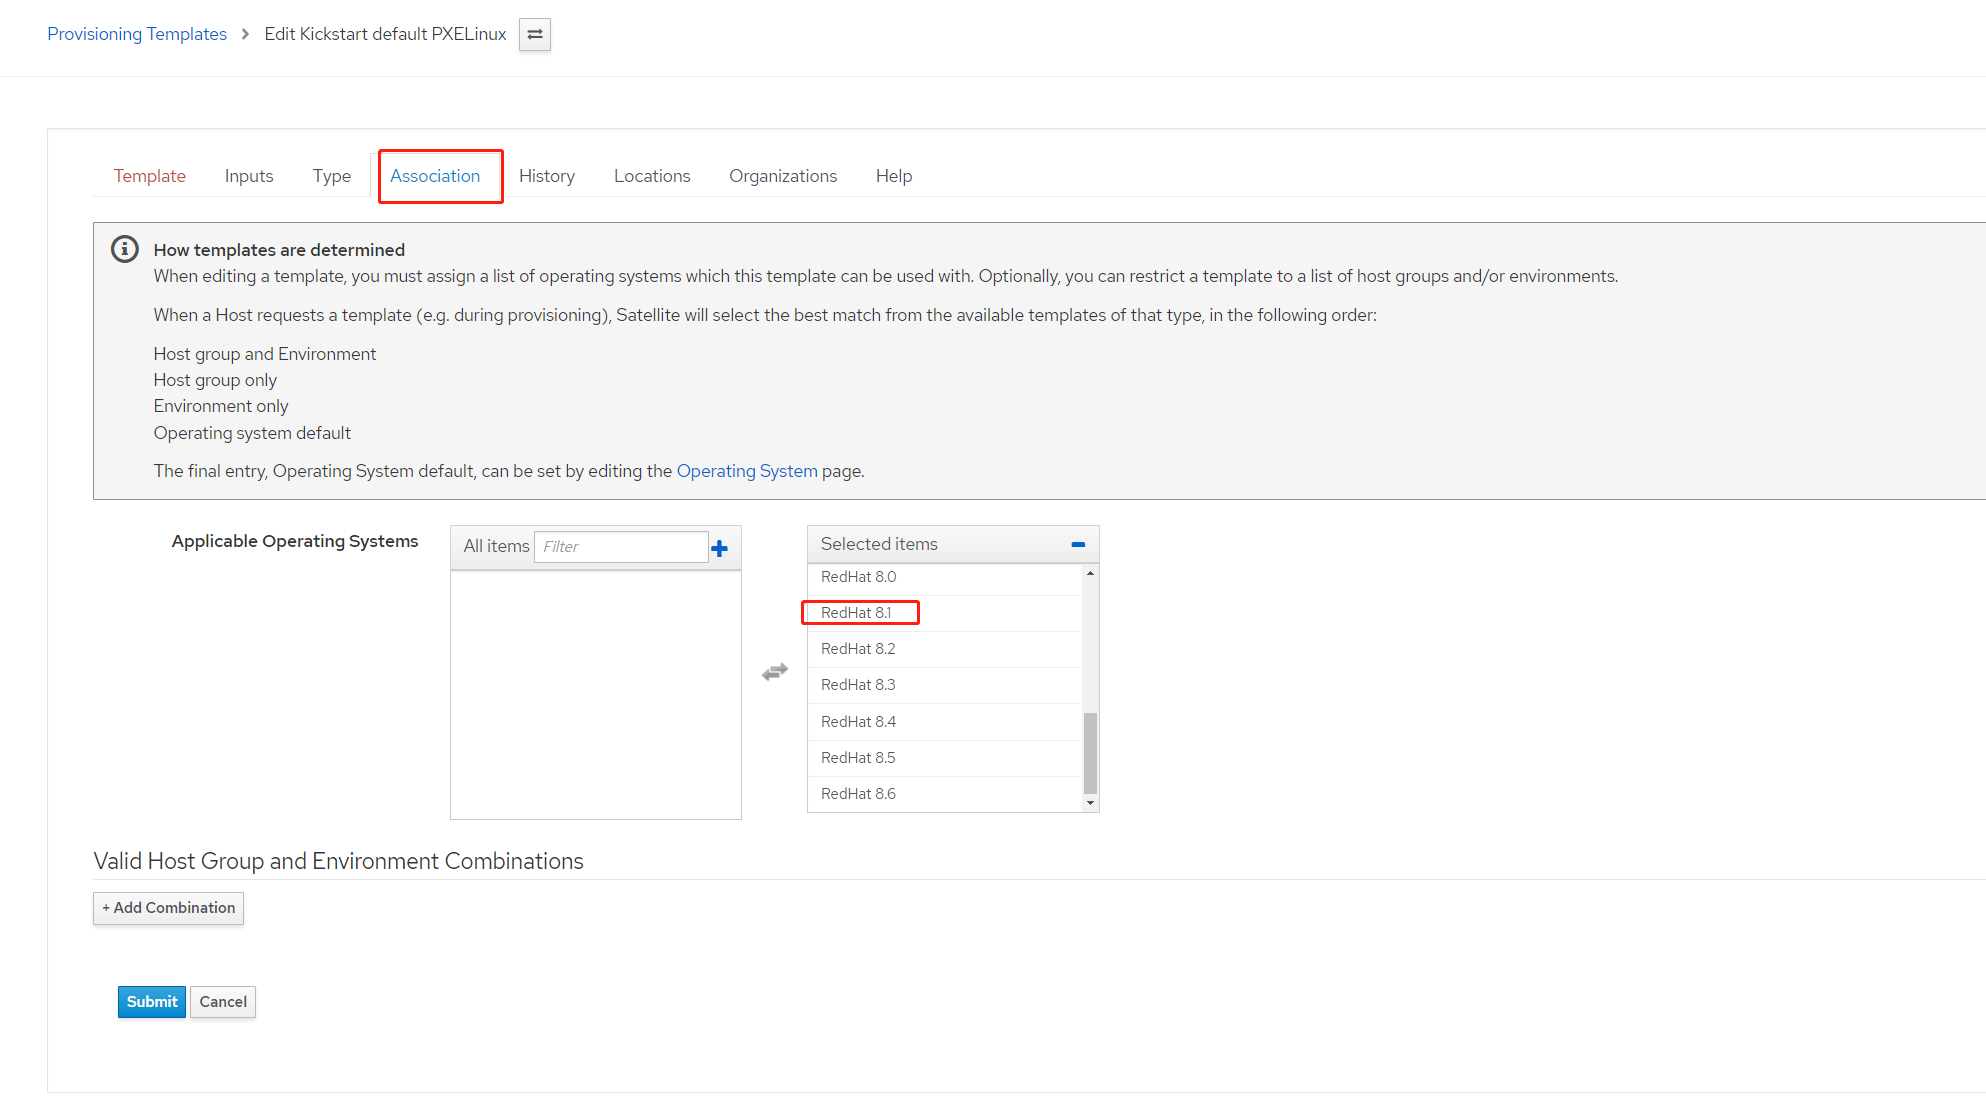
- Associtation 包含需要安装的操作系统
- Locations 保持和用于调配 capsule 一致,我环境中 capsule2 所属 location 为 loc,确认后点击
submit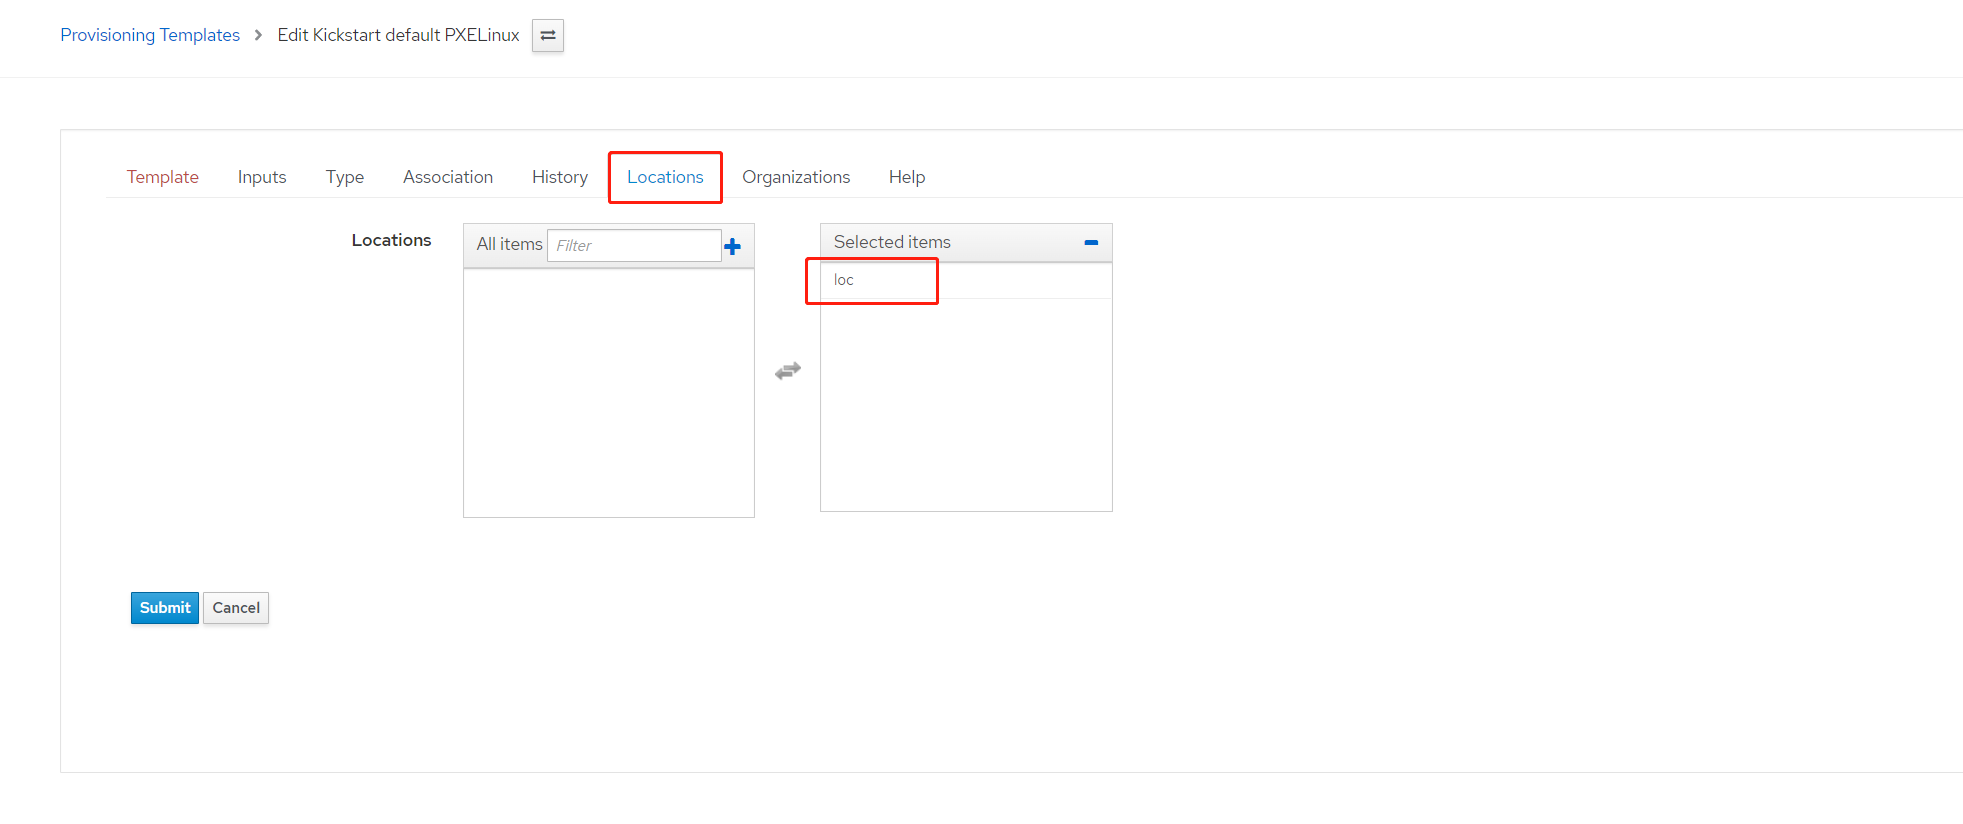
- Associtation 包含需要安装的操作系统
- 3.2 点击 Kictstart default 进行与
3.1相同的配置
- 配置 Hosts > Provisioning Templates 配置模板
- 确认分区表在当前位置 loc 可用
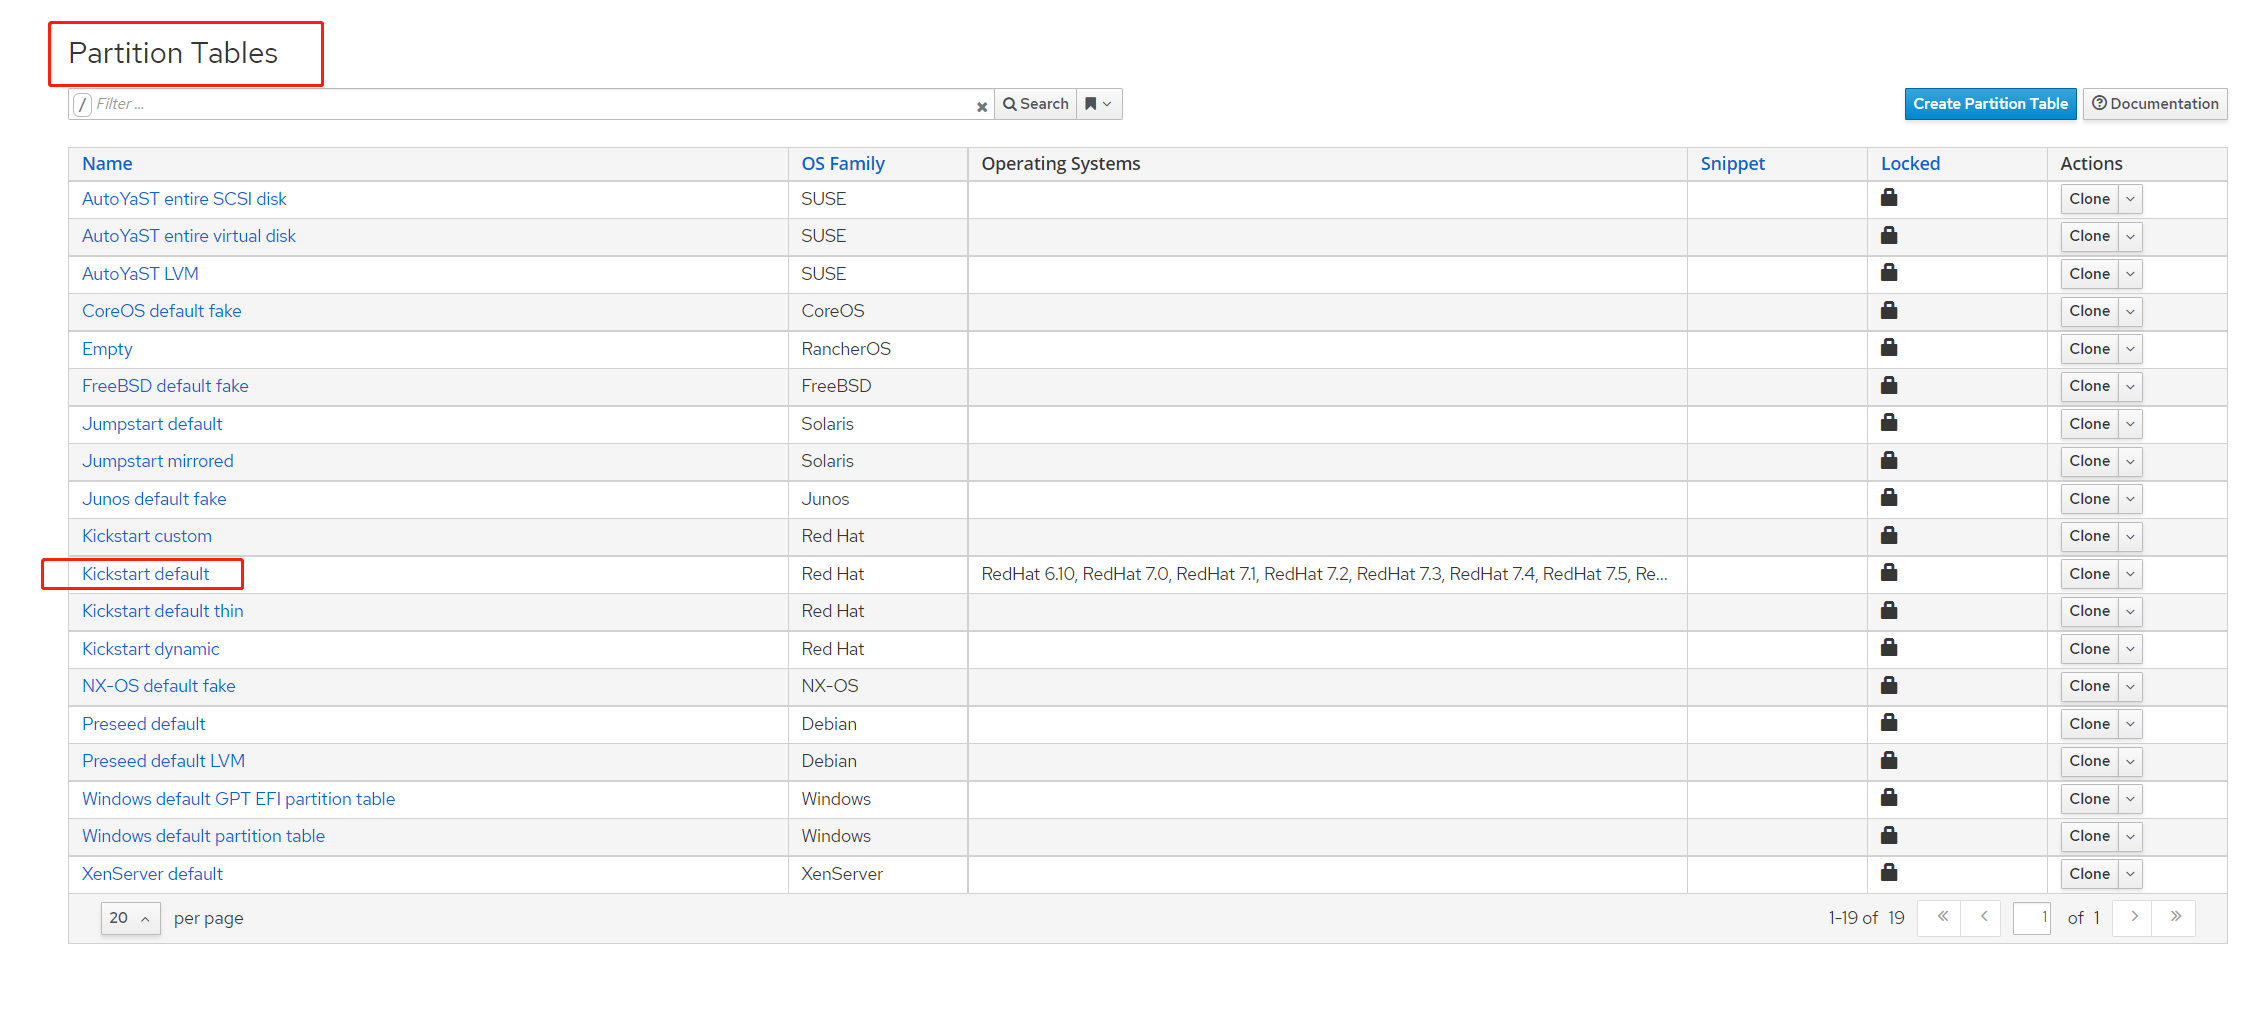
- 4.1 Hosts > Partition Tables 点击 Kickstart default
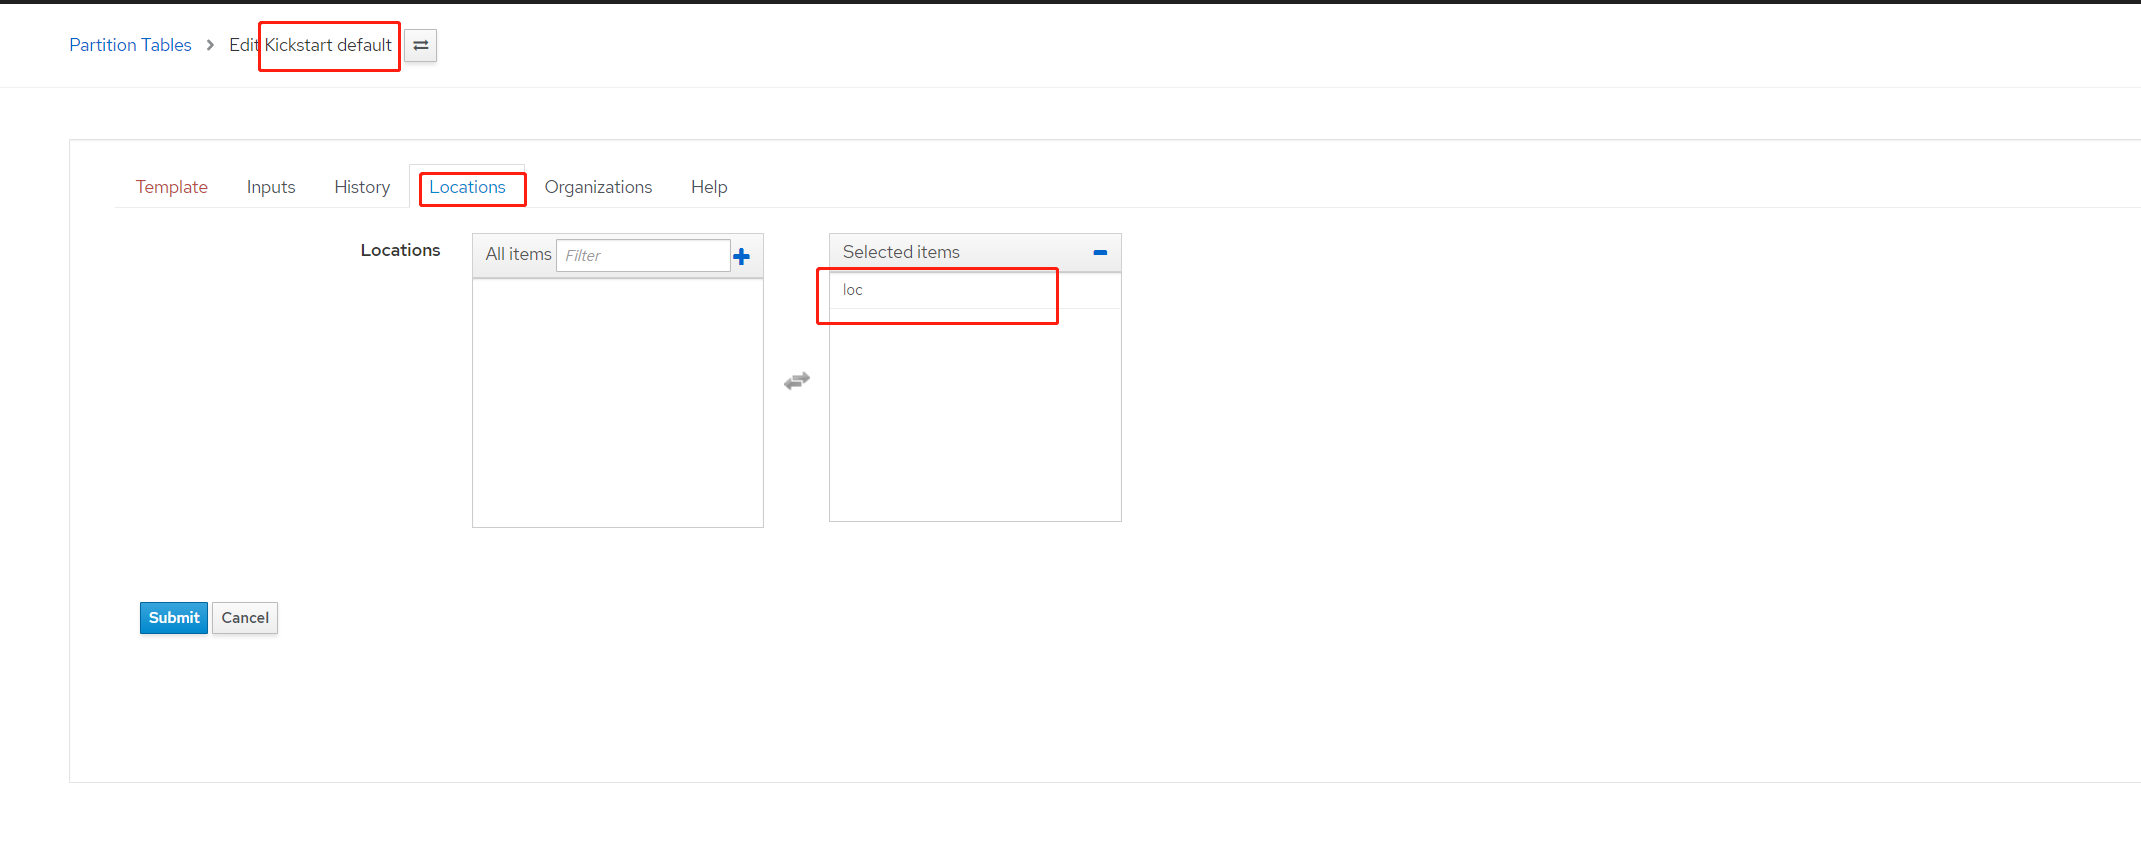
- 4.2 点击 Locations ,确保 loc 位置已经配置
- 确认希望安装的操作系统引用正确的调配模板和分区表
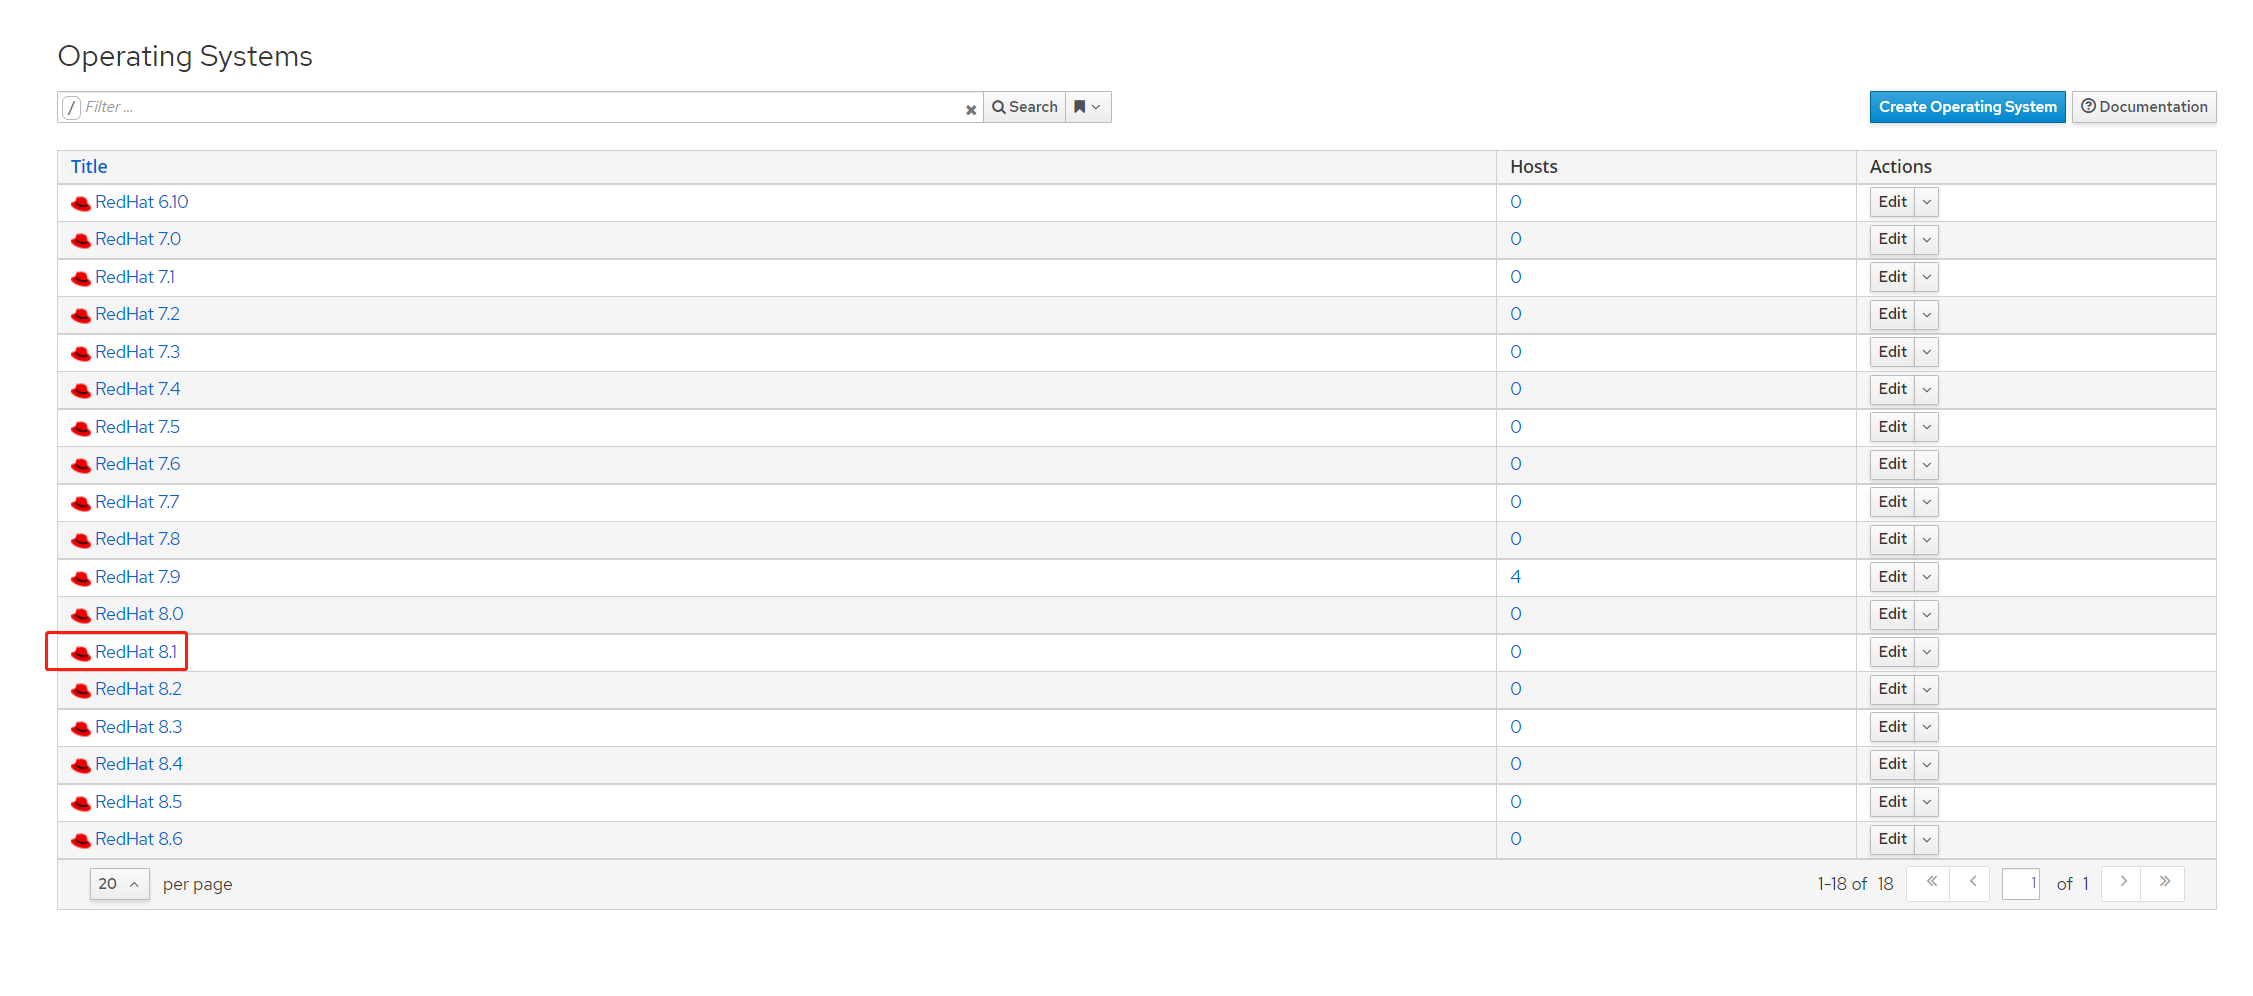
- 5.1 Hosts > Operating Systems 点击需要安装操作系统,我测试的为 rhel8.1
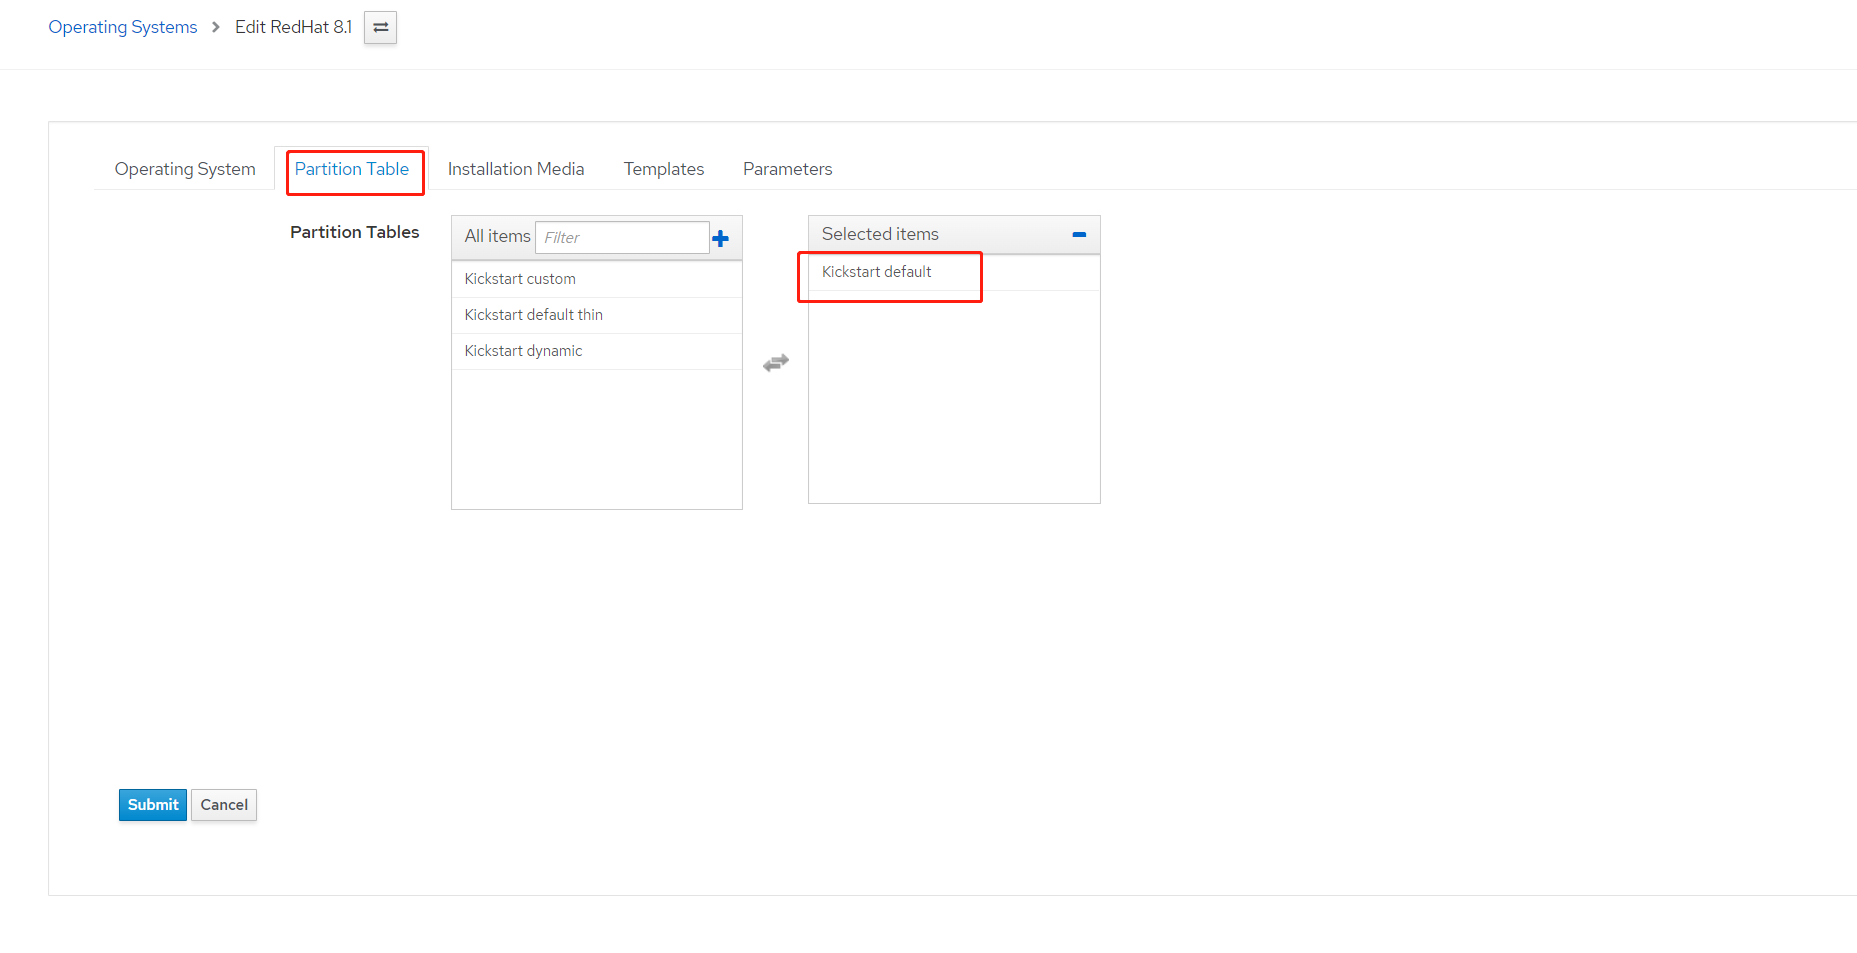
- 5.2 确保 Partition Table 标签下已经选中 Kictstart default
- 5.3 确保 Templates 下 PXELinux template 已设为 Kickstart default PXELinux ,
并且 Provisioning template 已设为 Kickstart default , 并点击 submit 提交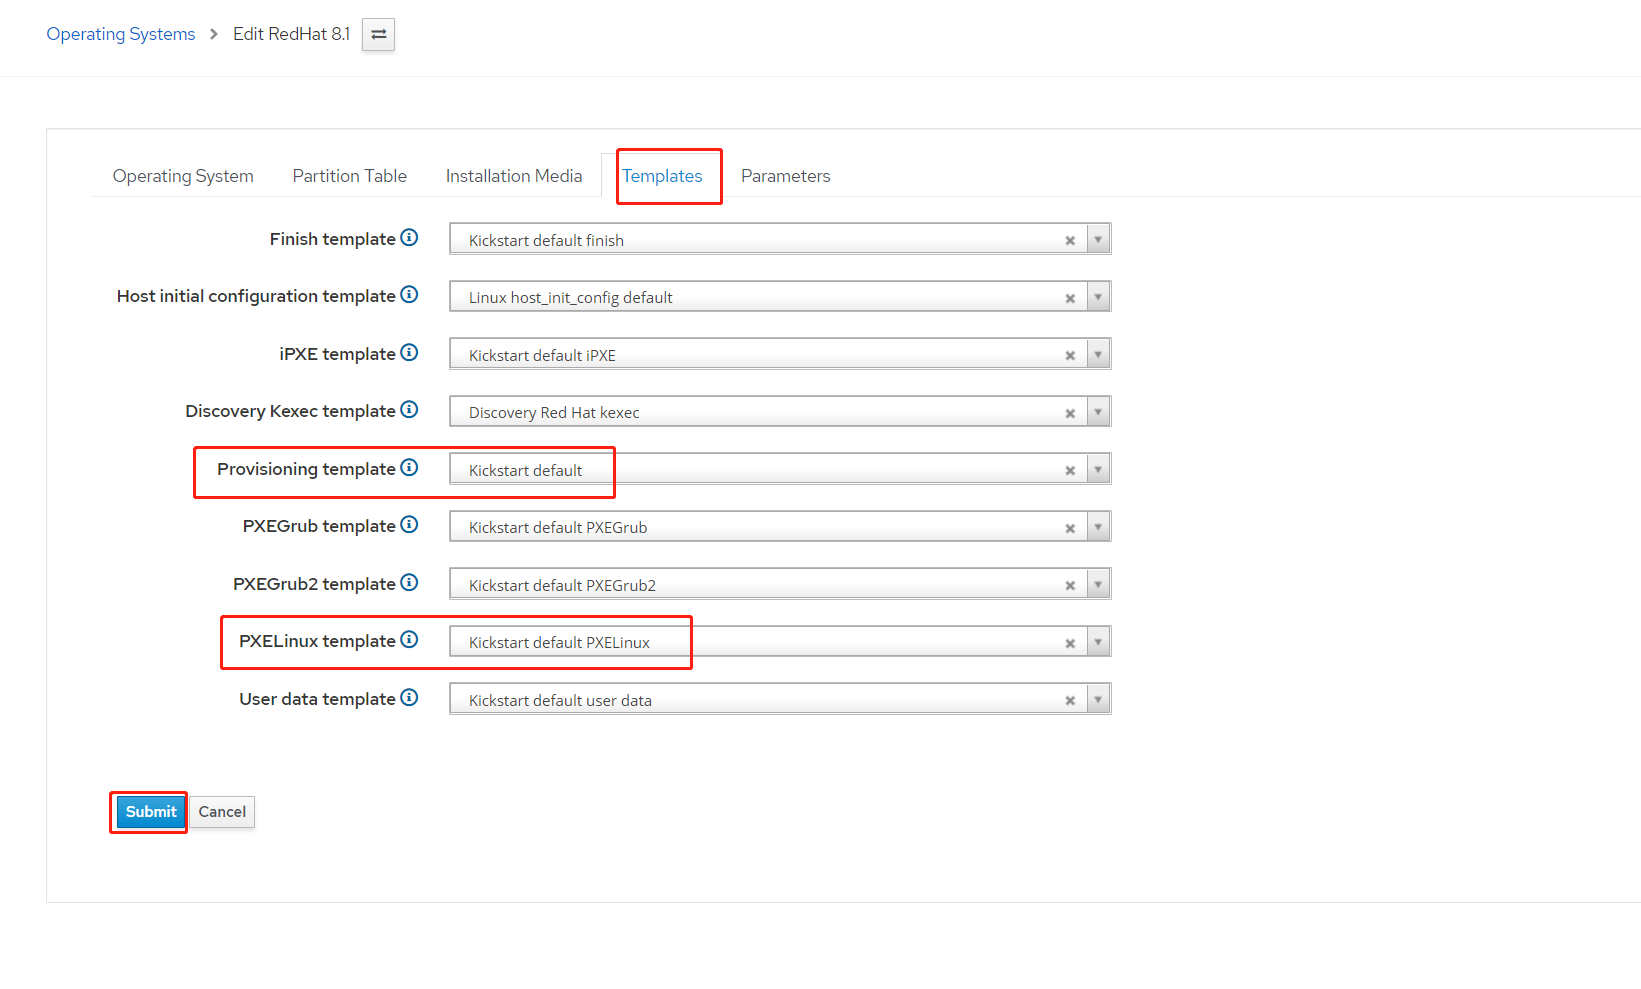
- 配置调配网络
6.1 我测试环境中,capsule2 的信息如下,并创建 ks.linuxone.in 的域名用于调配
参数 数值 DNS服务网卡 ens33(vmware 虚拟机默认网卡名) DNS 转发 192.168.31.1 DNS ZONE ks.linuxone.in DNS reverse 31.168.192.in-addr.arpa DHCP服务网卡 ens33(vmware 虚拟机默认网卡名) DHCP范围 192.168.31.20 - 192.168.31.35 DHCP主机 capsule2的ip 192.168.31.72 DHCP网关 192.168.31.1 在 capsule2 执行以下命令
1
2
3
4
5
6
7
8
9
10
11
12
# satellite-installer --scenario capsule \
--foreman-proxy-dns true \
--foreman-proxy-dns-interface ens33 \
--foreman-proxy-dns-forwarders 192.168.31.1 \
--foreman-proxy-dns-zone ks.linuxone.in \
--foreman-proxy-dns-reverse 31.168.192.in-addr.arpa \
--foreman-proxy-dhcp true \
--foreman-proxy-dhcp-interface ens33 \
--foreman-proxy-dhcp-range "192.168.31.20 192.168.31.35" \
--foreman-proxy-dhcp-nameservers 192.168.31.72 \
--foreman-proxy-dhcp-gateway 192.168.31.1 \
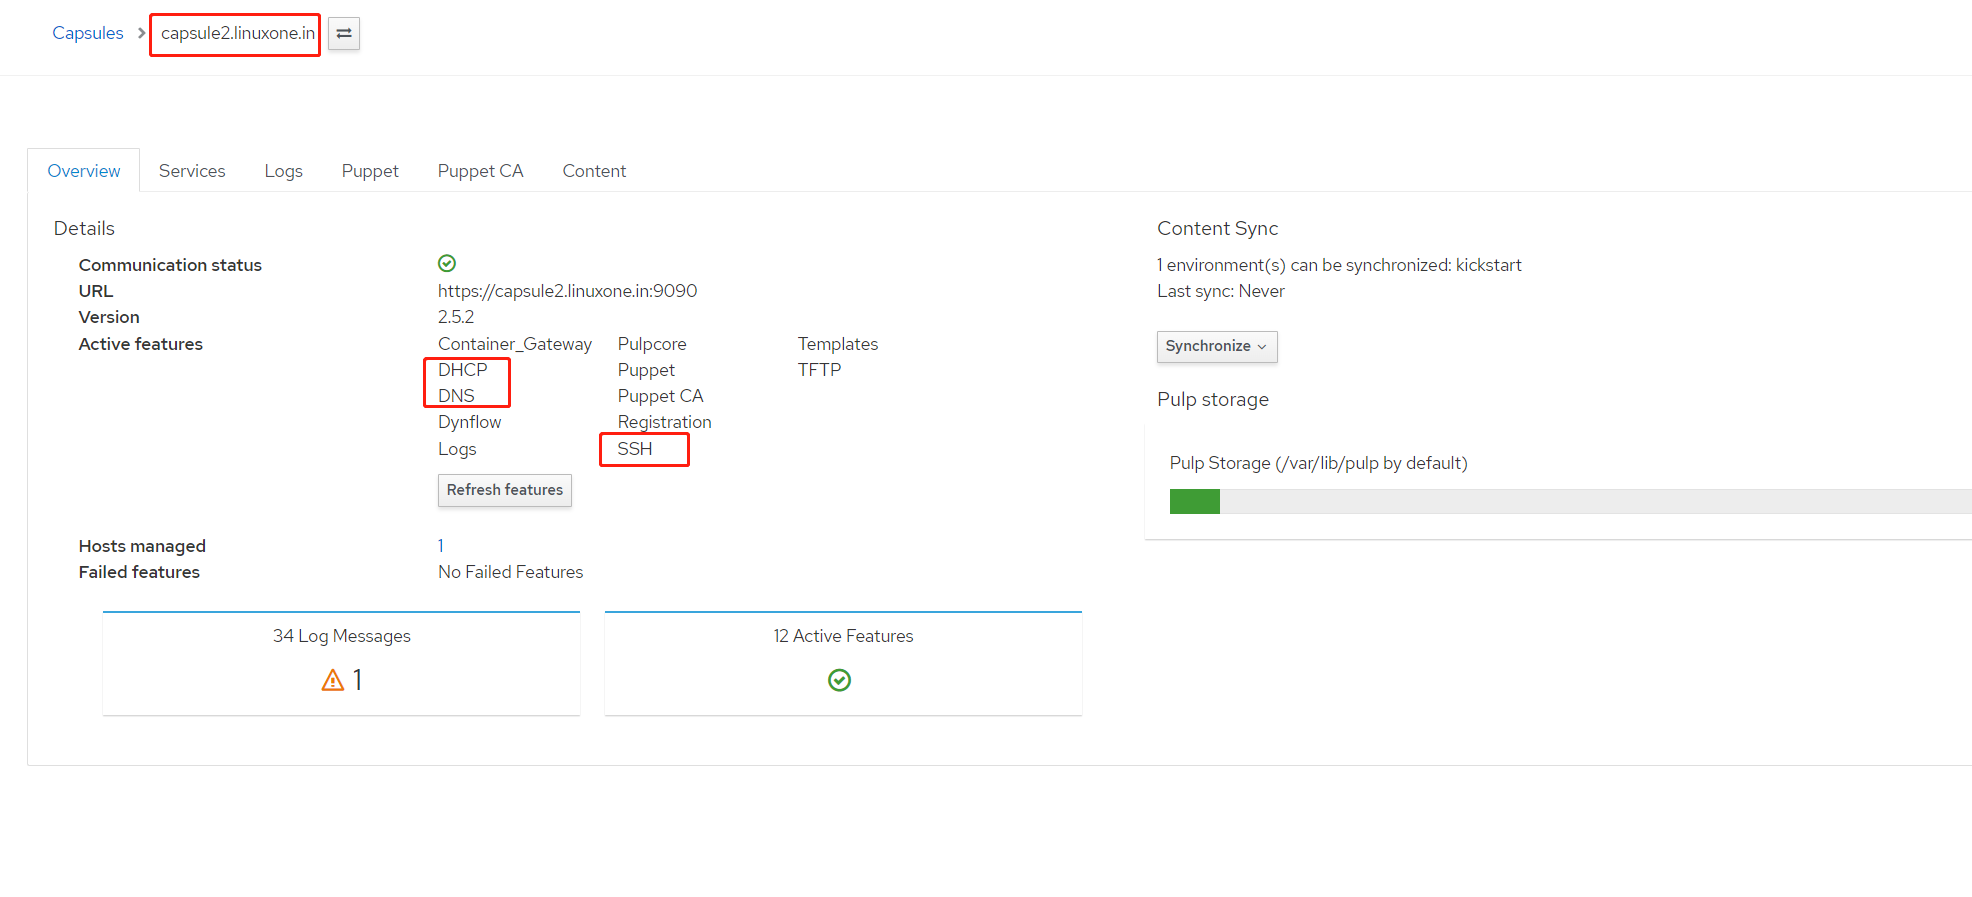
--foreman-proxy-tftp true6.2 确认 capsule2 的 DNS、DHCP、TFTP 功能已经启用 Infrastructure > capsules > capsule2.linuxone.in 在 Active features 查看,如果没有请刷新尝试
- 创建 ks.linuxone.in DNS 域名
- 7.1 Infrastructure > Domains 点击 Create Domain
- DNS Domain 输入 ks.linuxone.in
- DNS Capsule 输入 capsule2.linuxone.in

- DNS Capsule 输入 capsule2.linuxone.in
- 确认位置 loc 已经关联
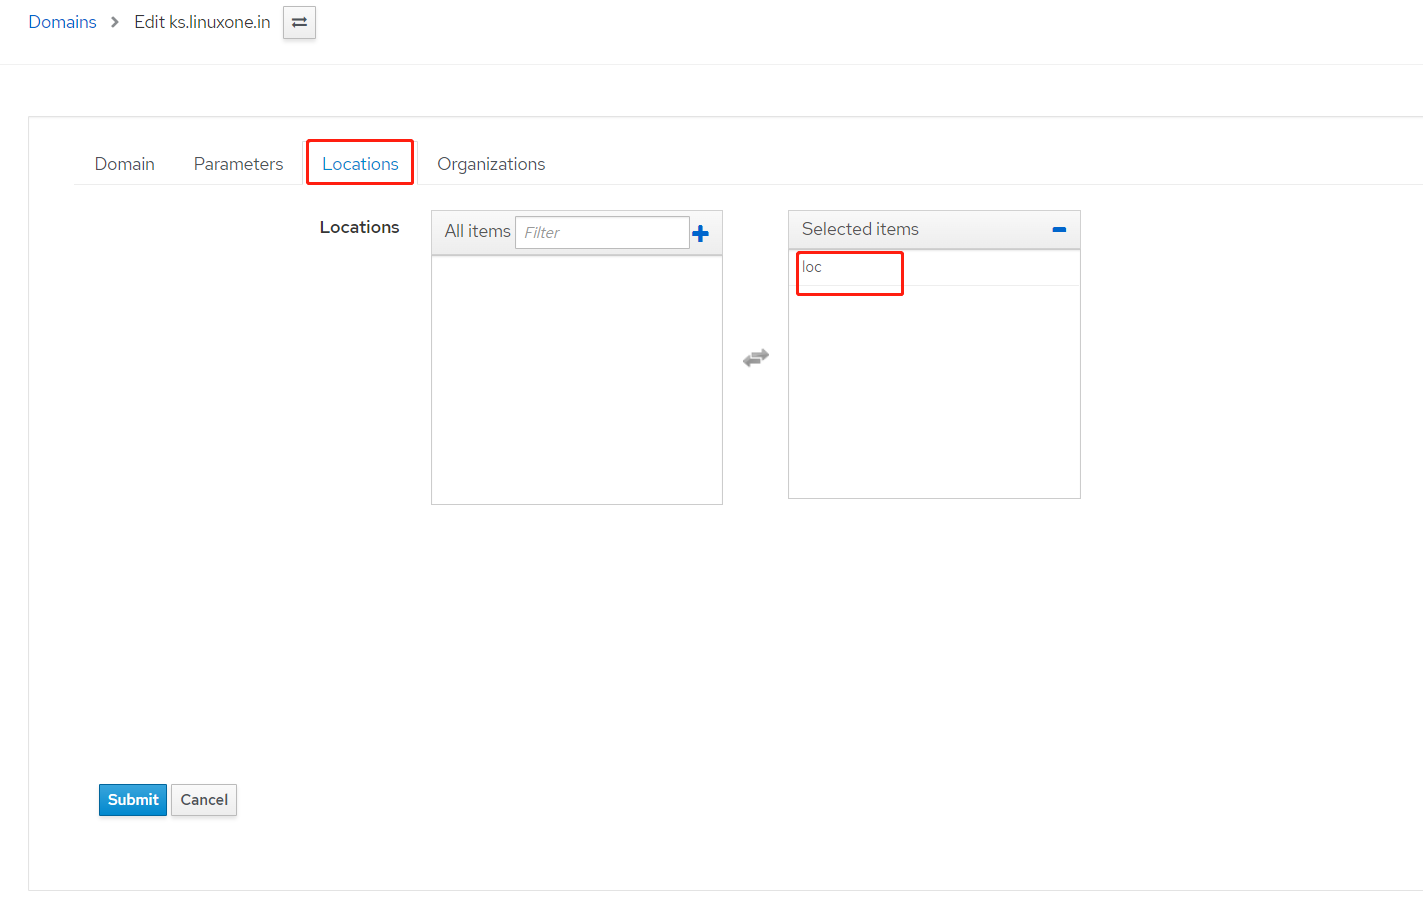
- 确认位置 loc 已经关联
- 确认组织 org 已经关联
- 点击
submit提交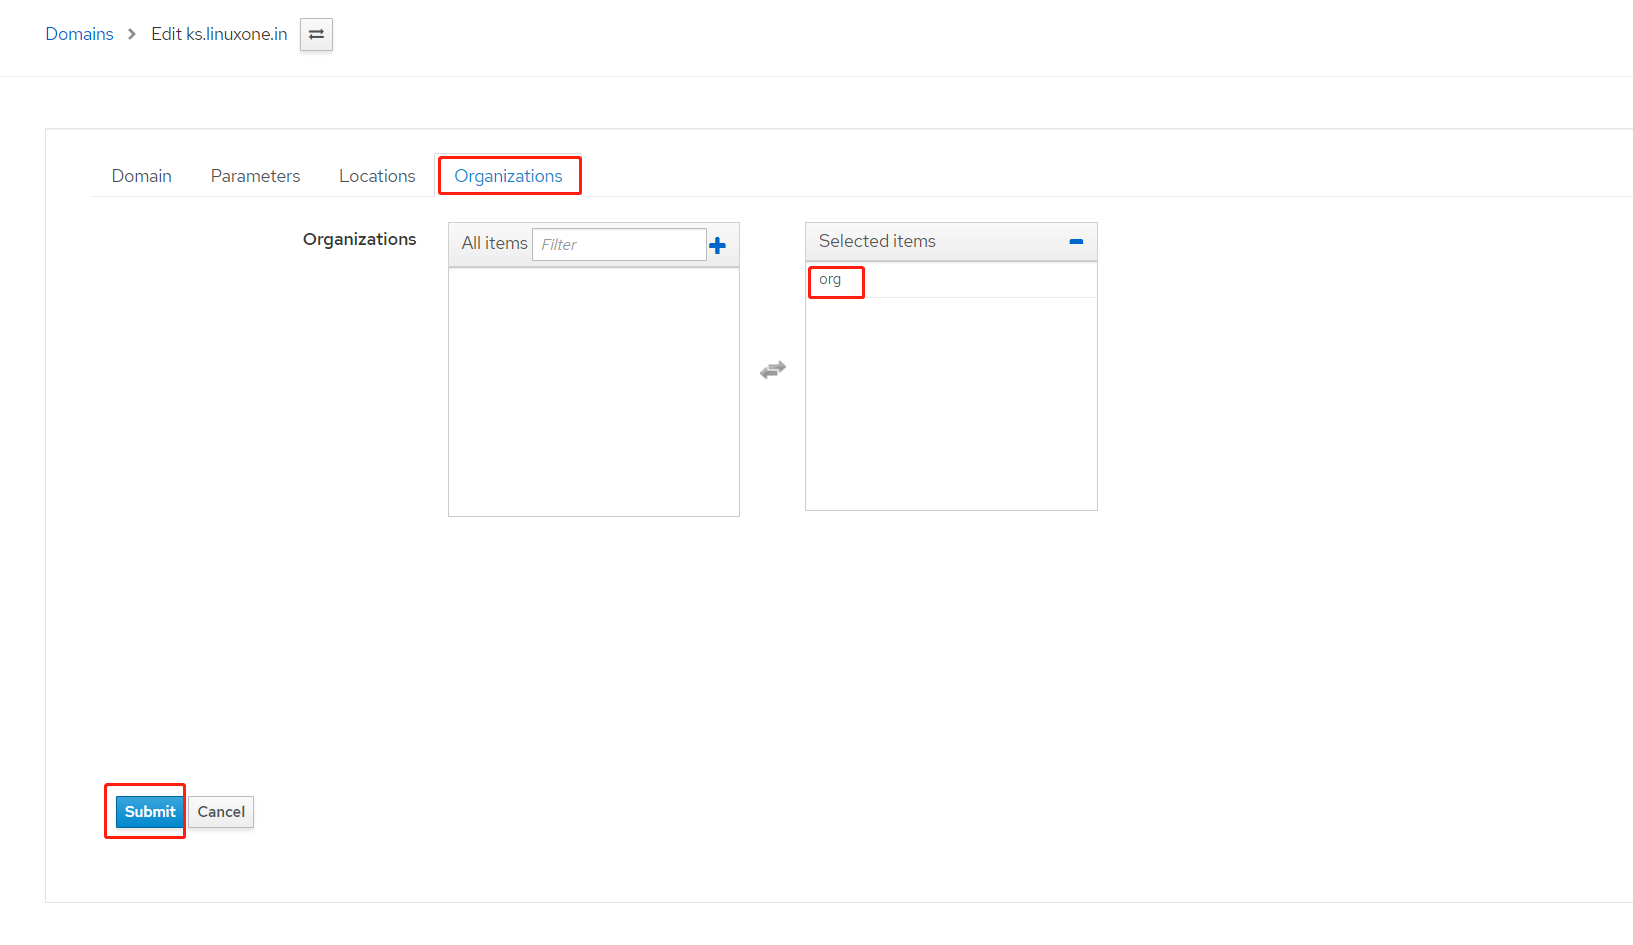
- 点击
- 创建 kickstart 专用子网,子网名 ks date center
- 8.1 Infrastructure > Capsules 点击 capsule2.linuxone.in

- 8.2 点击 Actions 并选择 Import IPv4 subnets
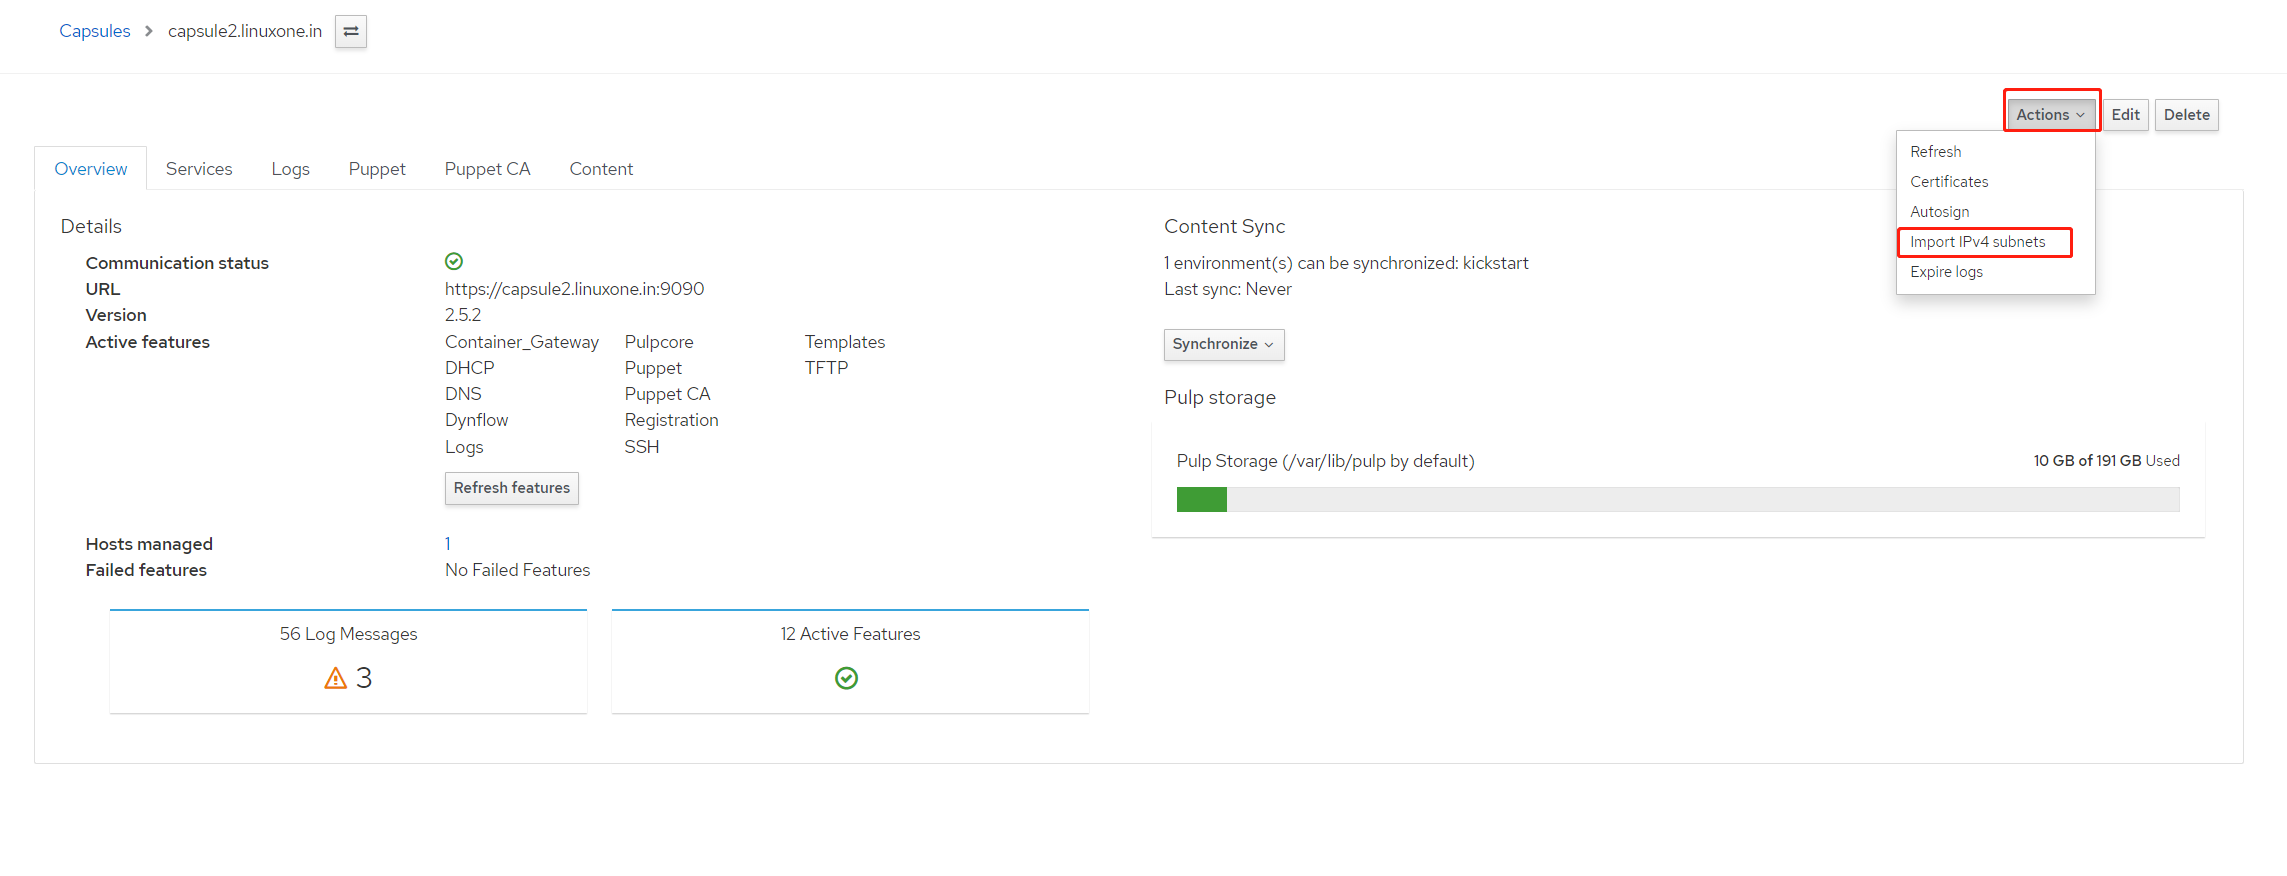
- 8.3 子网信息如下,并点击
submit提交参数 数值 Name ks date center Primary DNS Server 192.168.31.72 IPAM DHCP
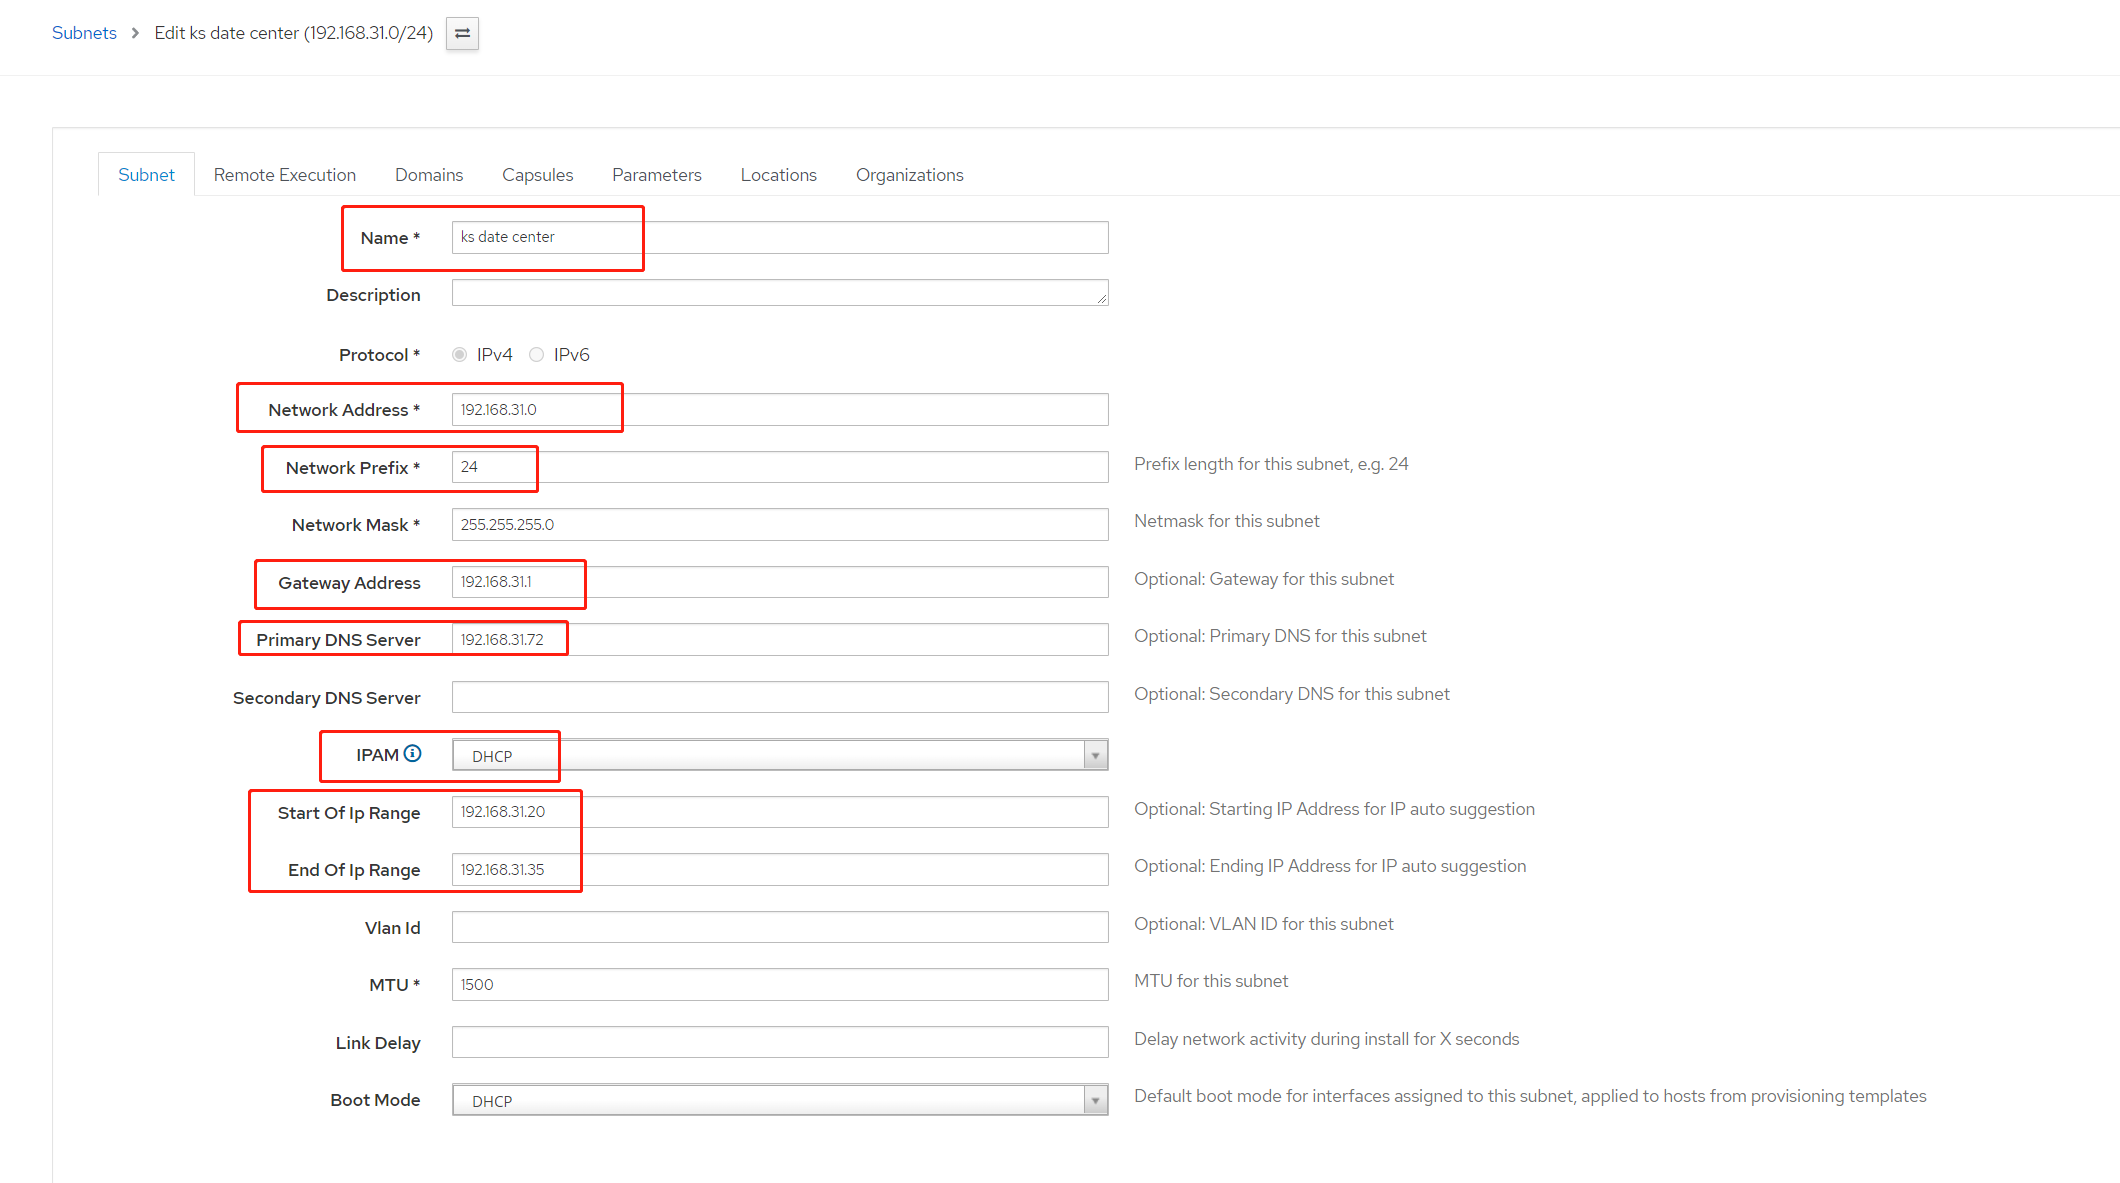
- 修改子网配置
- 9.1 Infrastructure > Subnets 点击 ks date center ,Subnet 标签根据之前 DHCP 时的规划填写
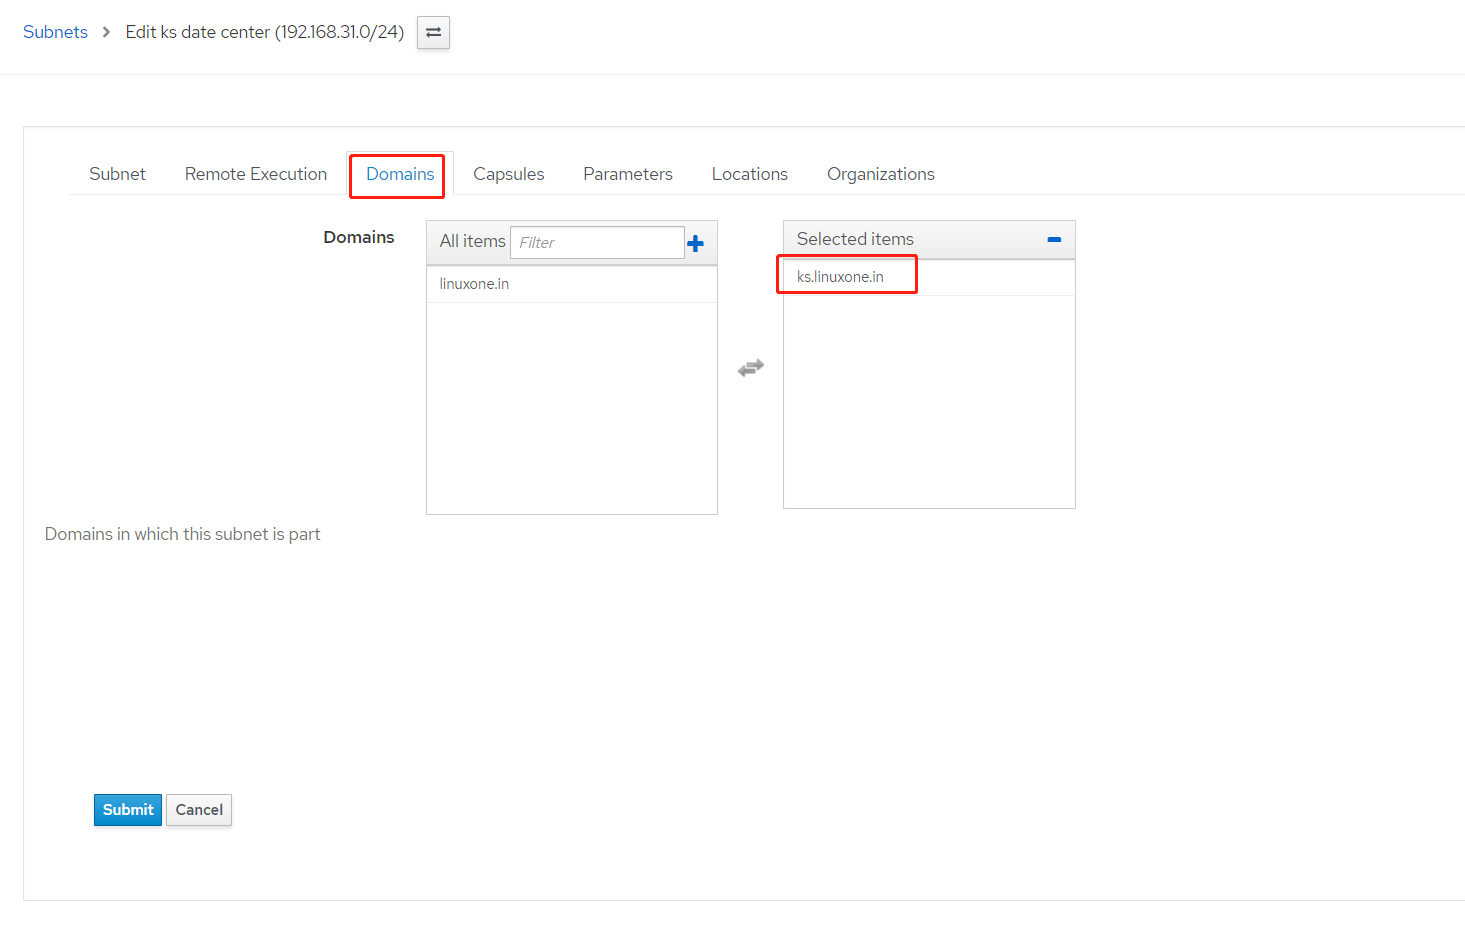
- 9.2 Domains 标签下,将该子网与 Domain ks.linuxone.in 关联
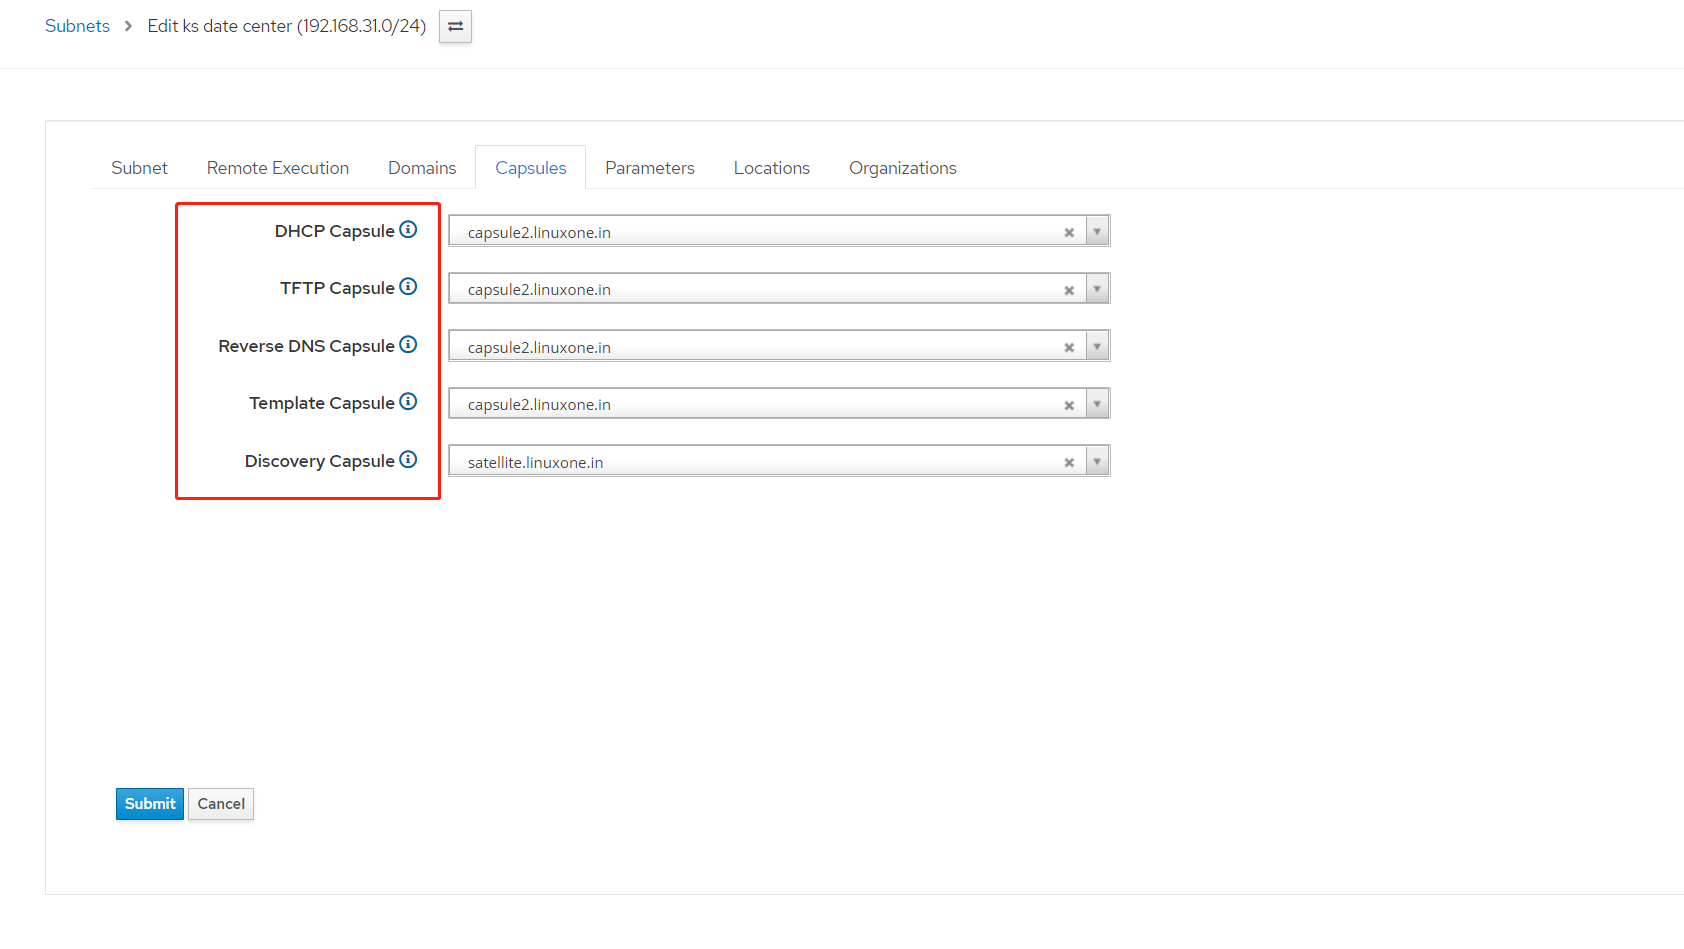
- 9.2 capsules 标签下,将所有可选项均修改为 capsule2.linuxone.in
- 9.3 Locations 与 Organizations 标签,请选择与 capsule2 相同的内容
- 创建主机组
- 10.1 Configure > host groups 点击 Create Host Groups 内容以下
参数 数值 Name ks host group (自定义即可) Lifecycle Env kickstart(由之前创建) Content View kictstart(由之前创建) Content Source capsule2.linuxone.in 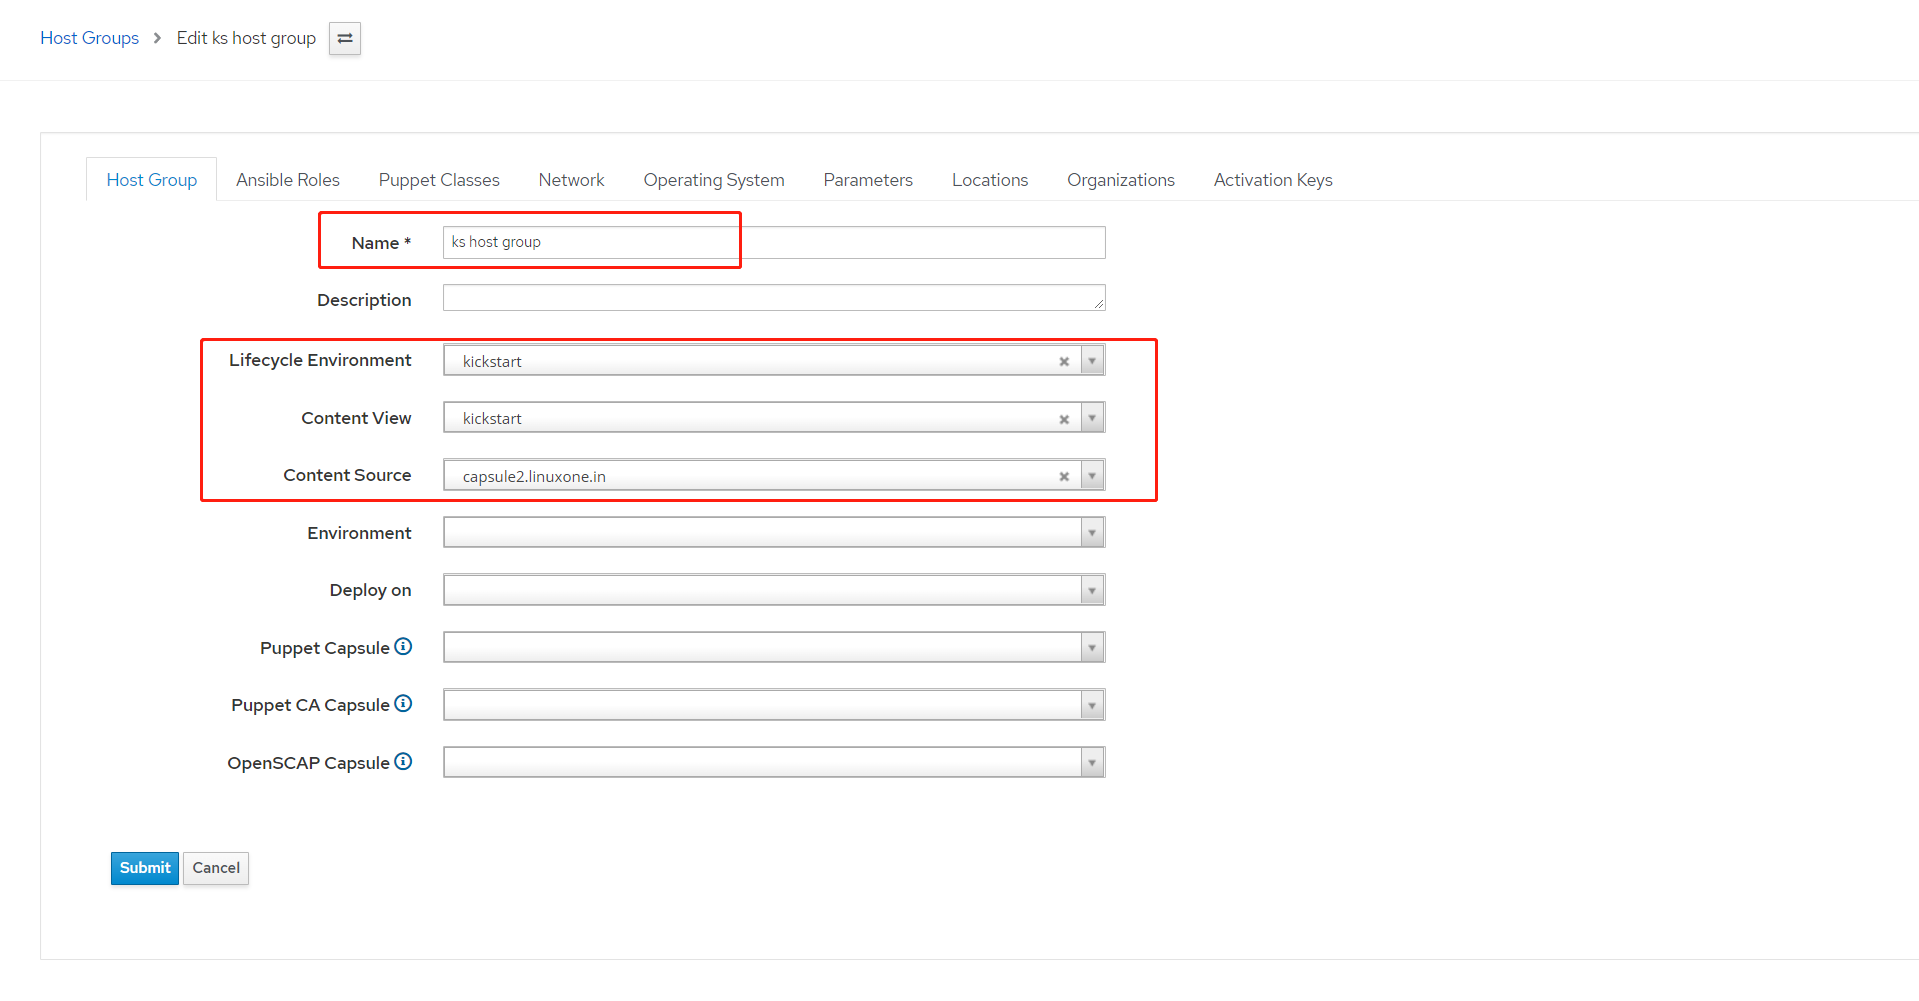
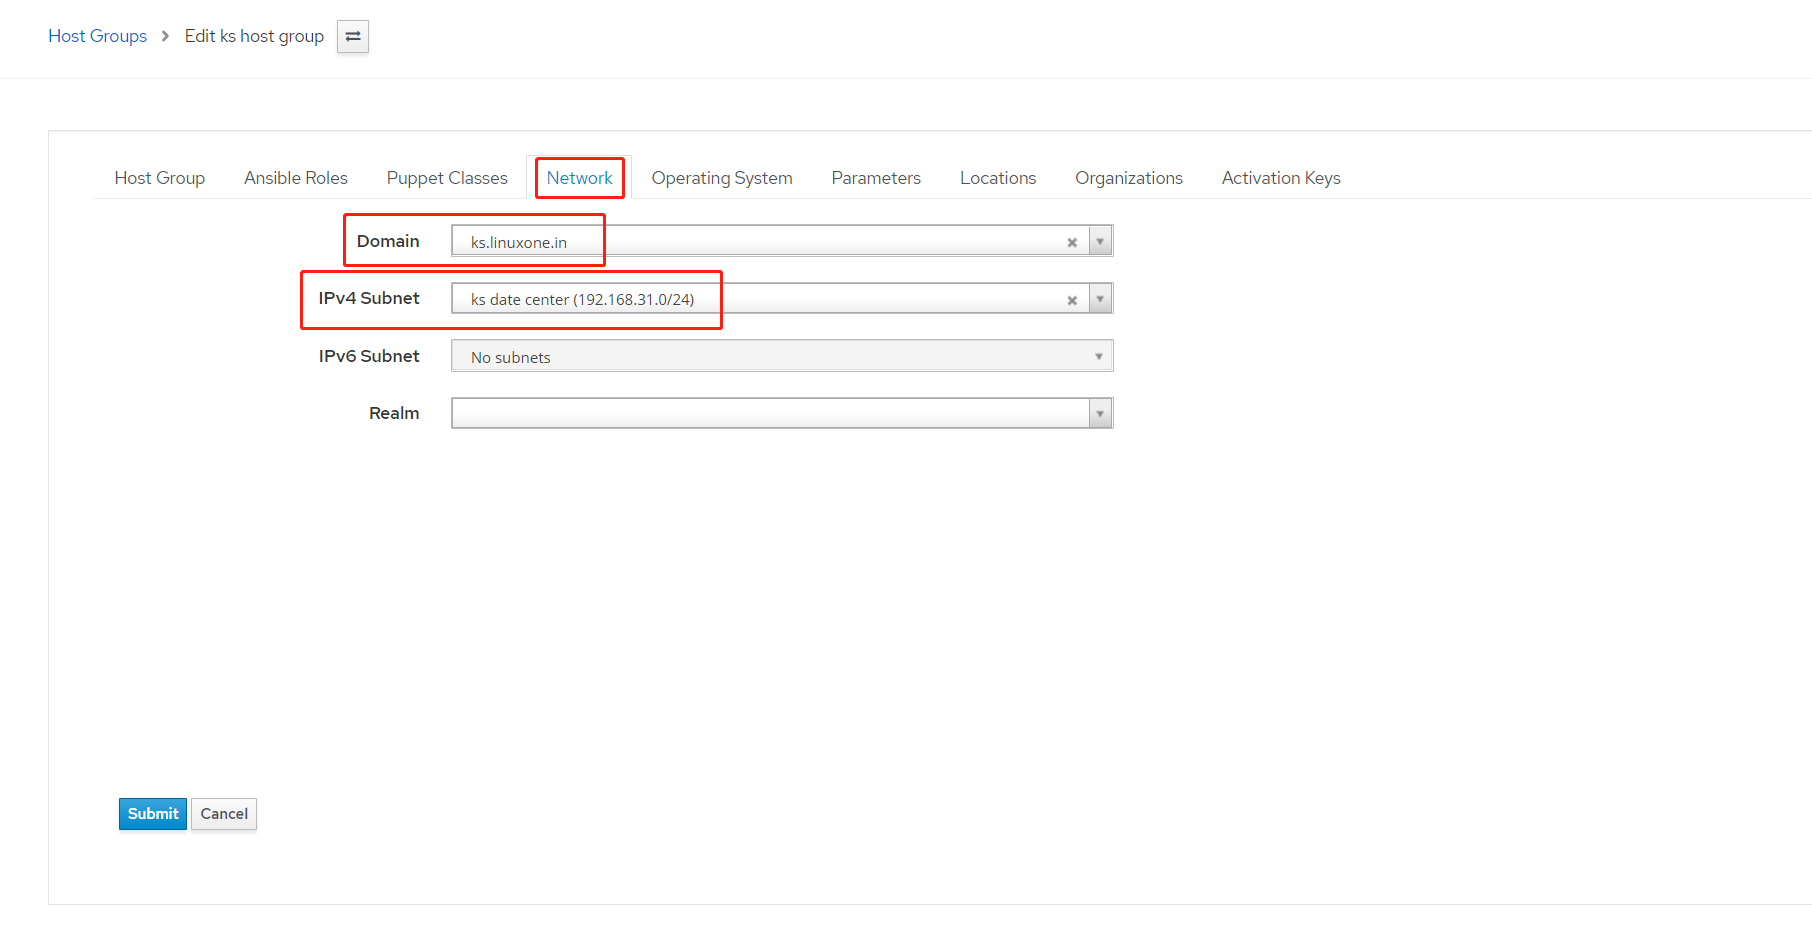
- 10.2 Network 选项卡,将 Domain 配置为 ks.linuxone.in ,ipv4 subnet 配置为 ks date center
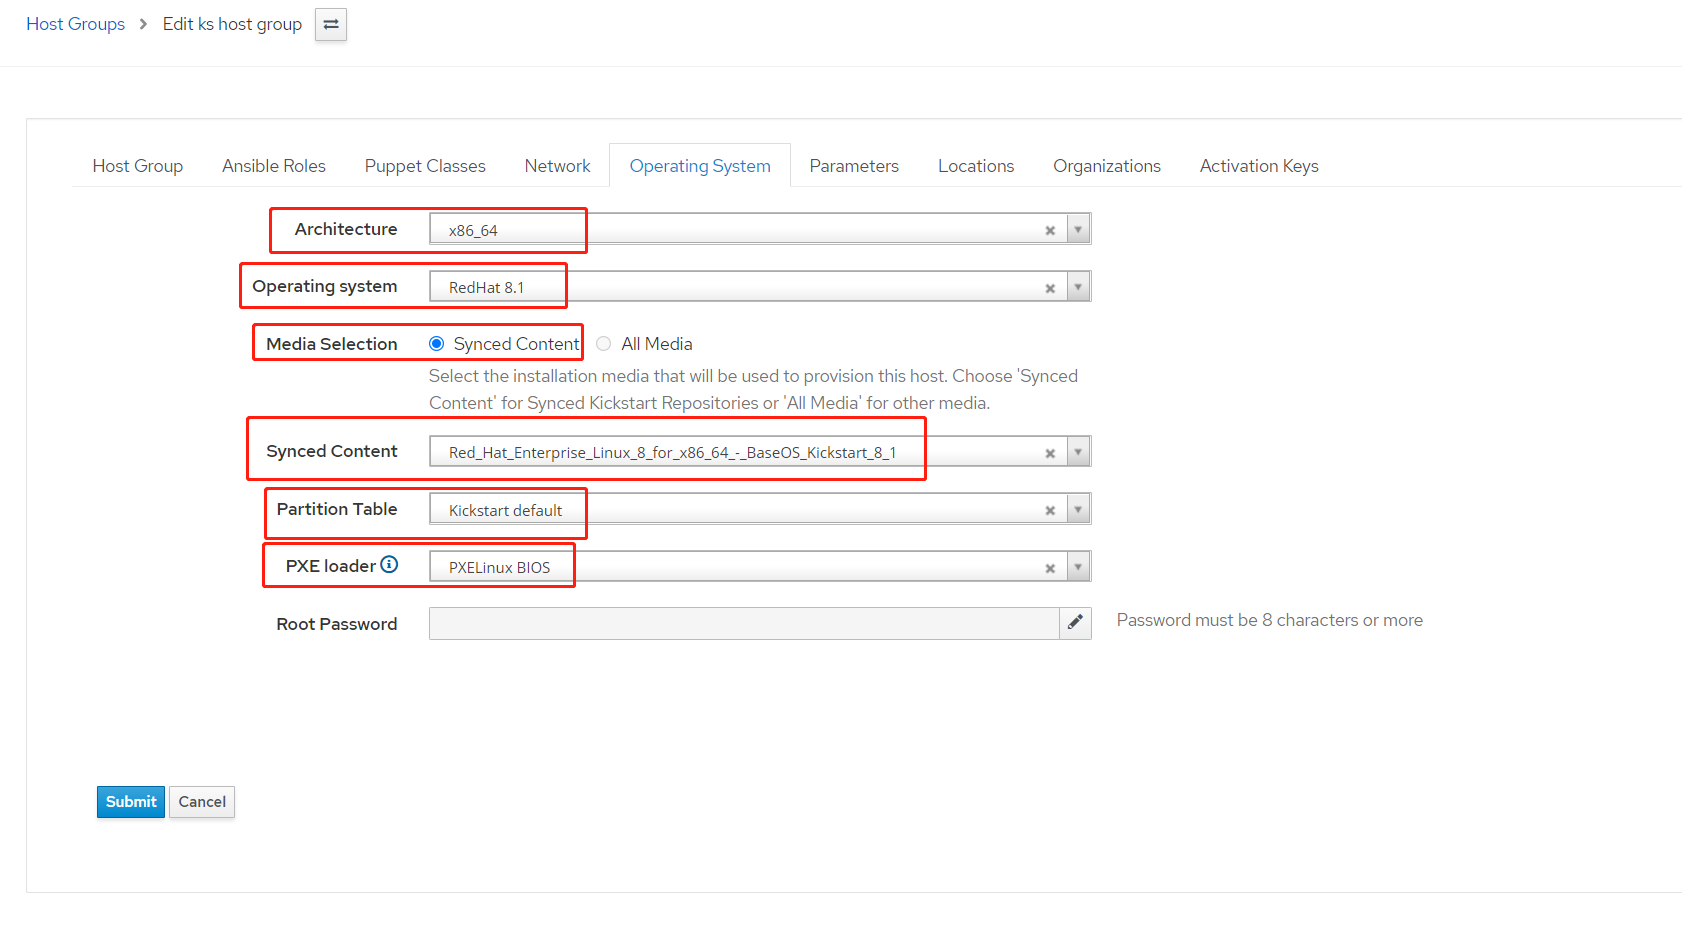
- 10.3 Operating System 标签卡进行如下配置
- 10.4 Locations 与 Organizations 标签,请选择与 capsule2 相同的内容,点击
submit提交
- 调配主机,pxe 创建 rh8u1.ks.linuxone.in
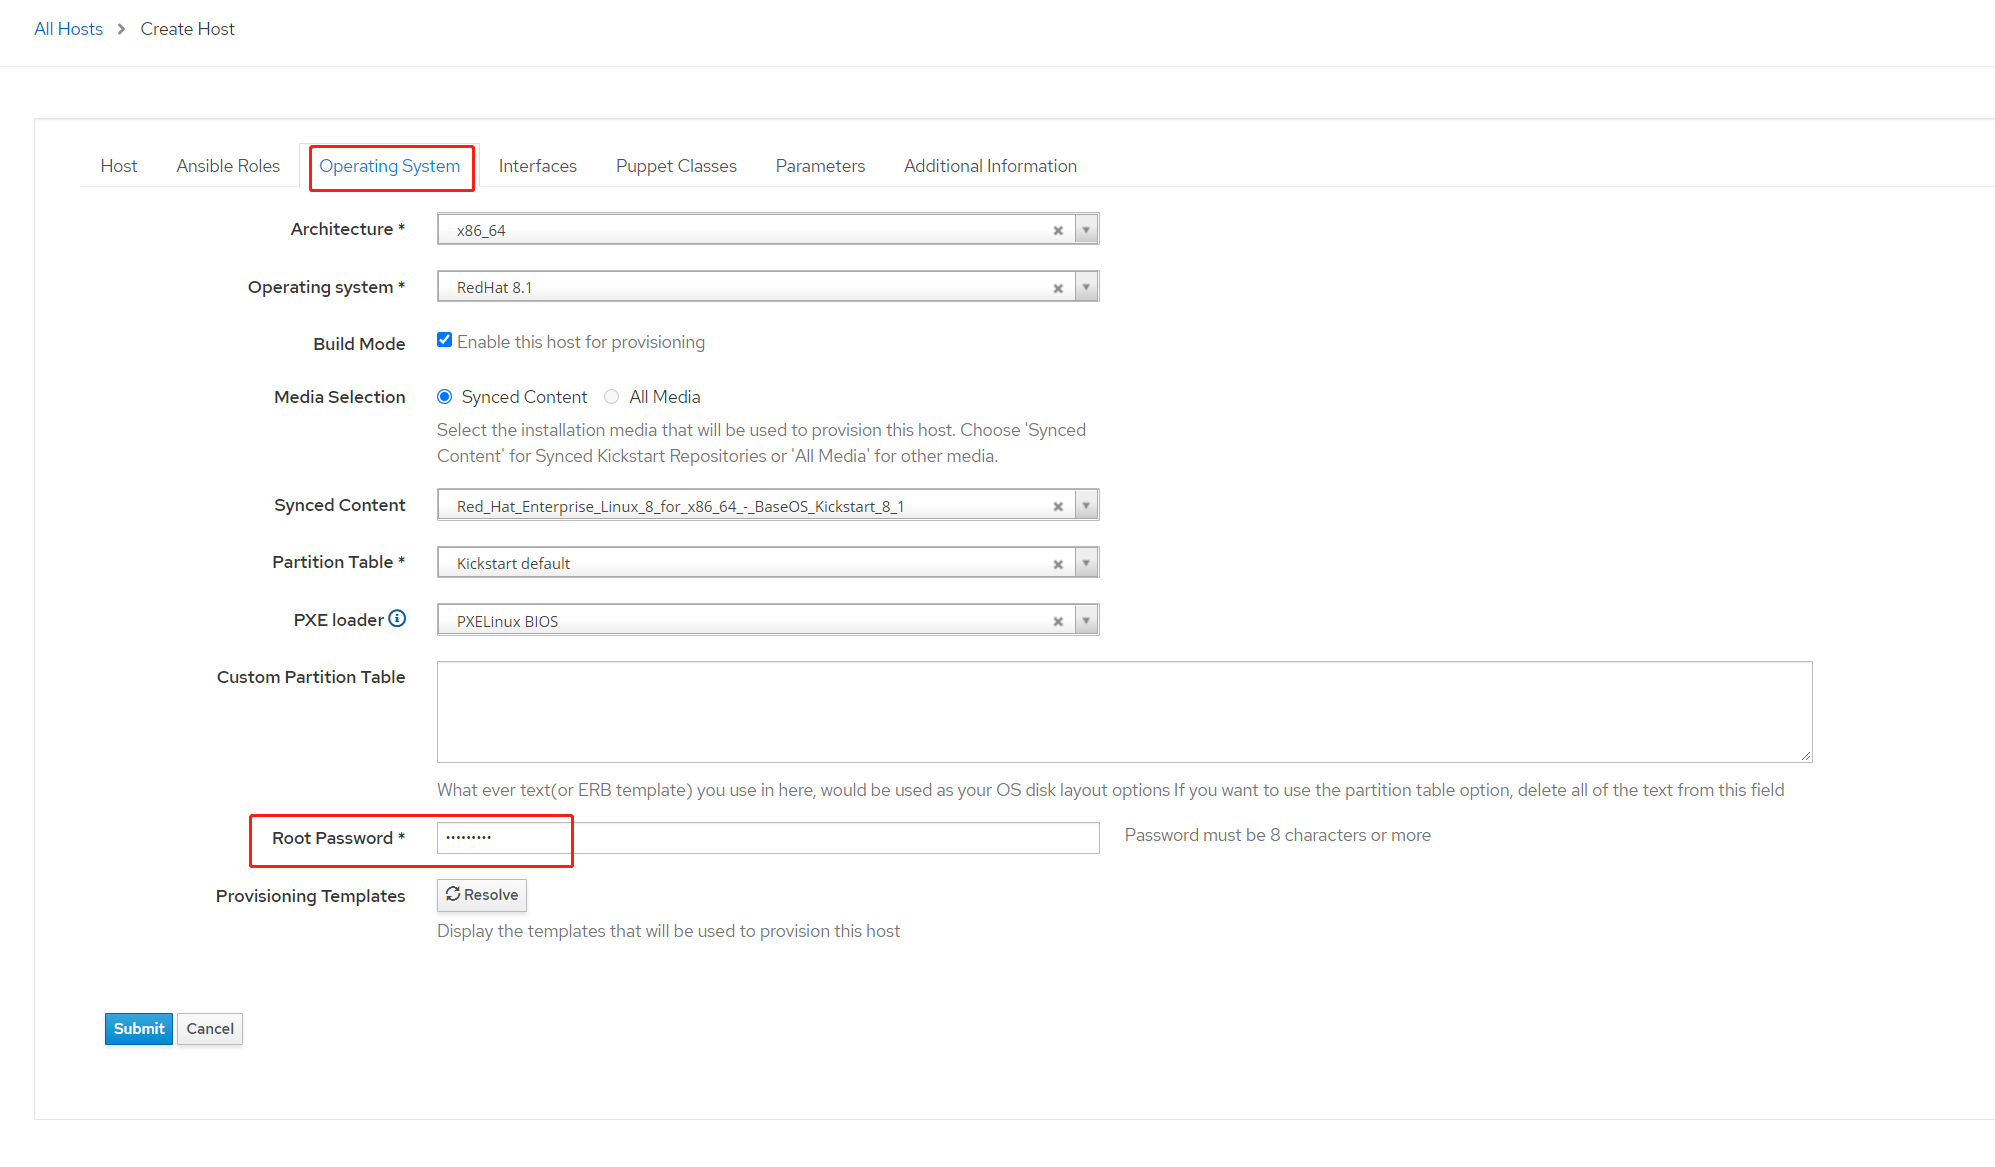
- 11.1 Hosts > Create host 创建以下信息
参数 数值 Name rh8u1 Host Group ks host group Organization org Location loc 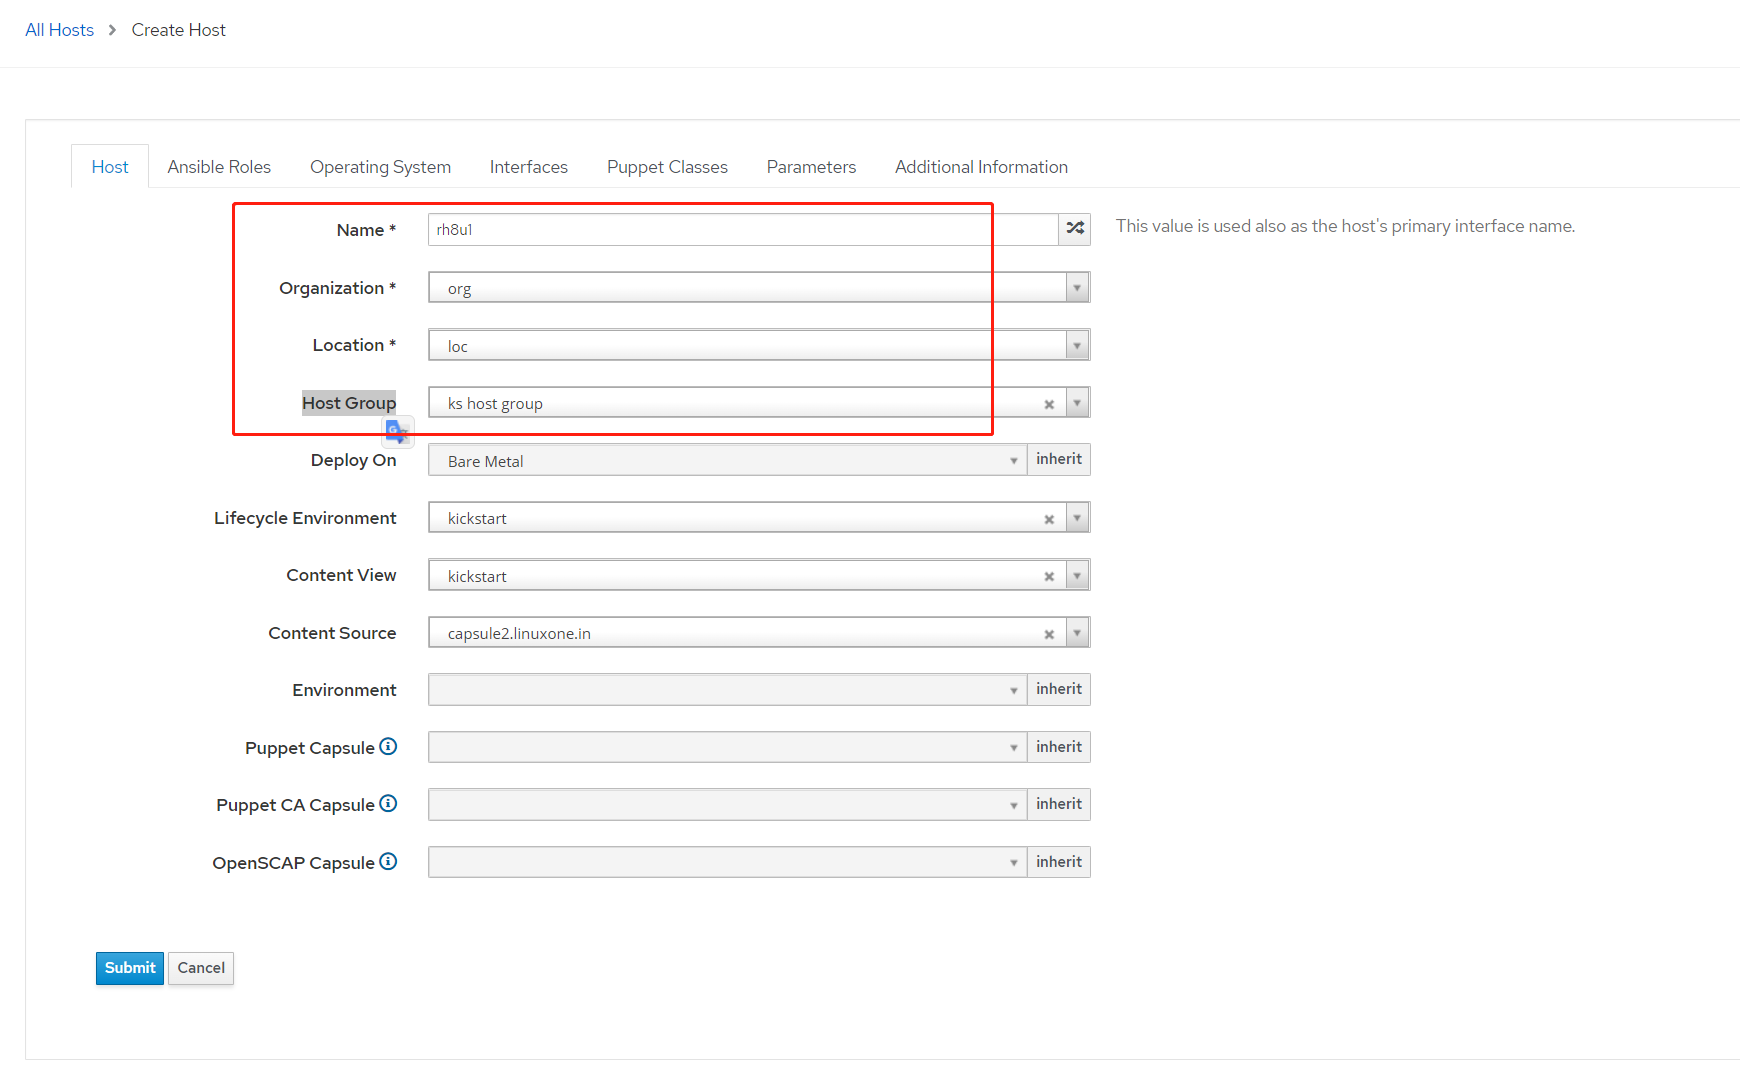
- 11.2 Operating Systemt 标签下,更改 root 密码为 redhat123 ,点击 resolve 可以验证 pxe 配置
- 11.3 配置 pxe 网卡
- Interfaces 标签,点击 Edit
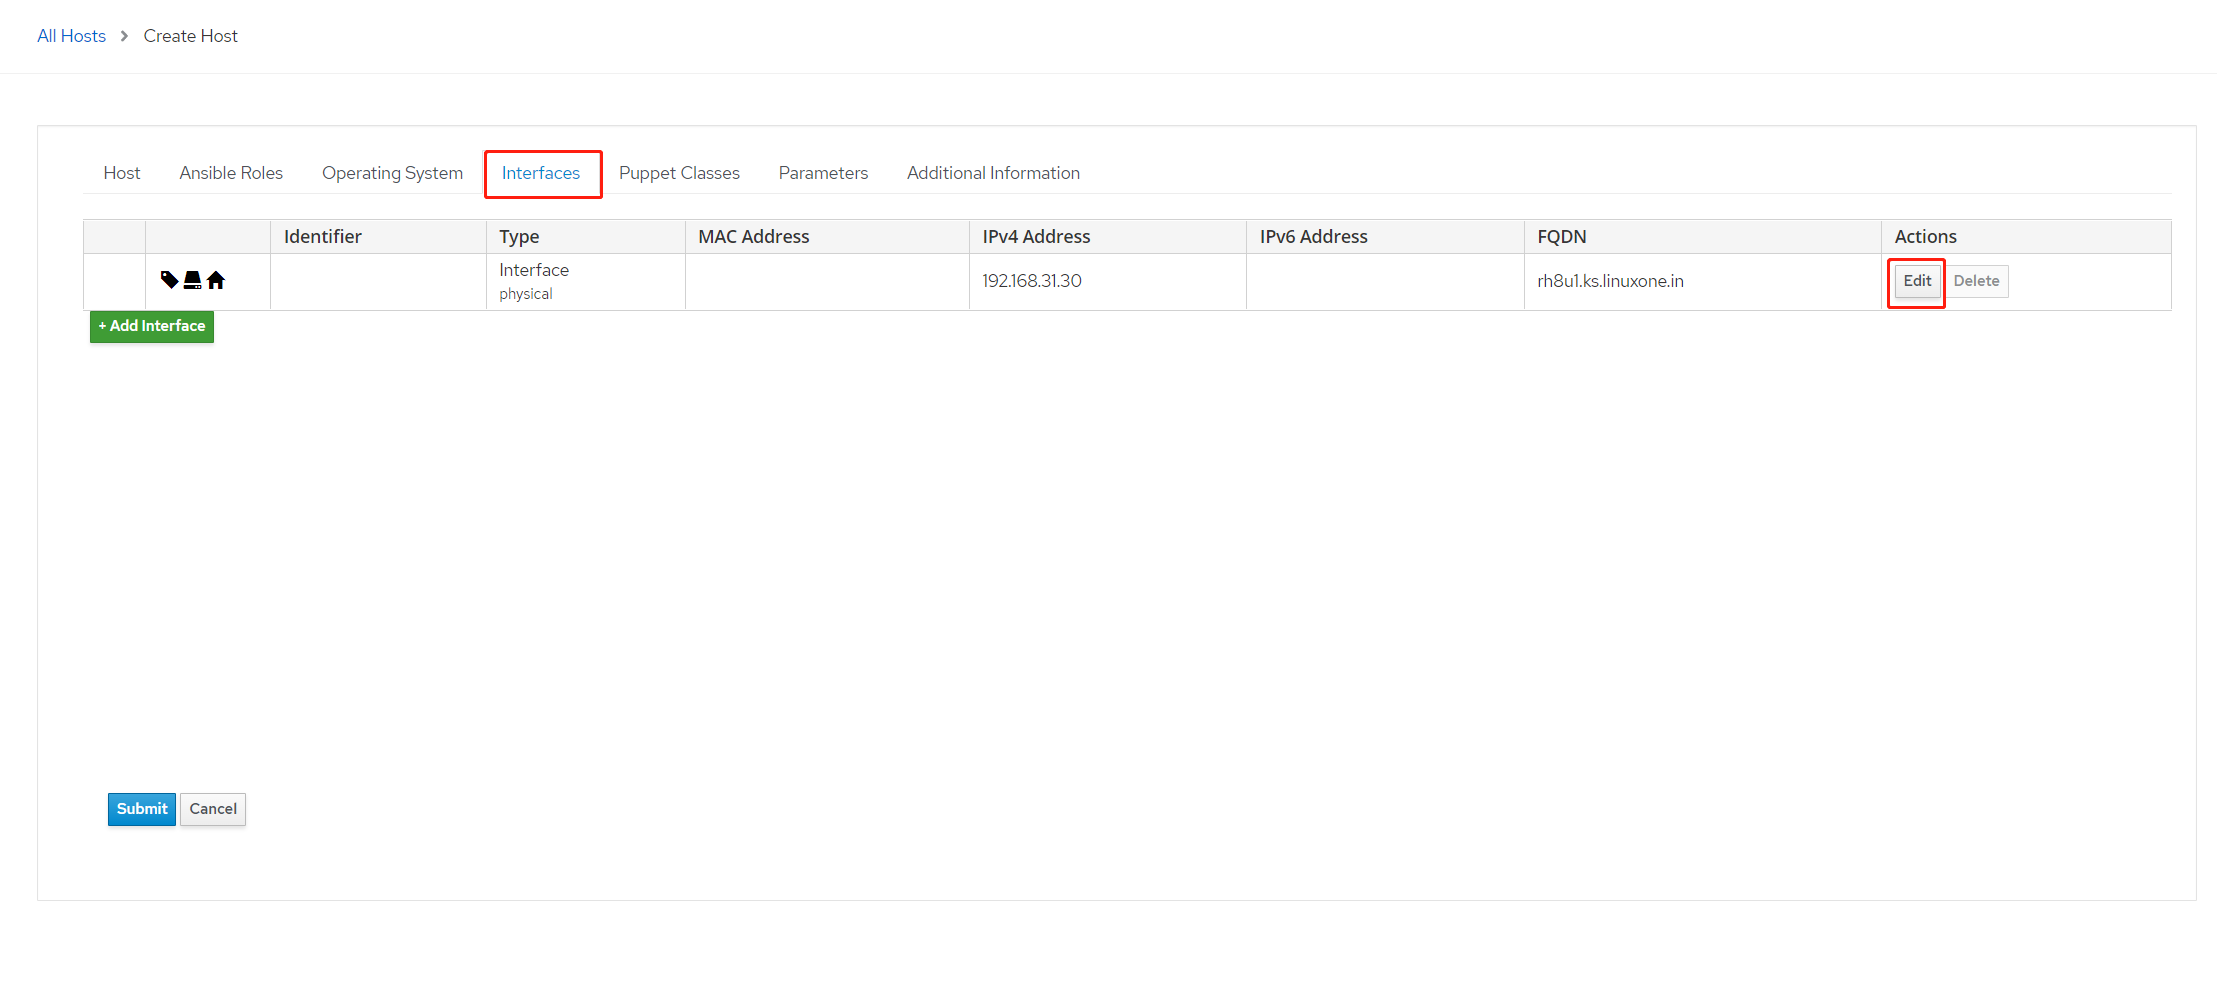
- Interfaces 标签,点击 Edit
- 其中 mac address 填写网卡 mac 地址,我使用的 vmware 虚拟机,则额外勾选 virtual NIC
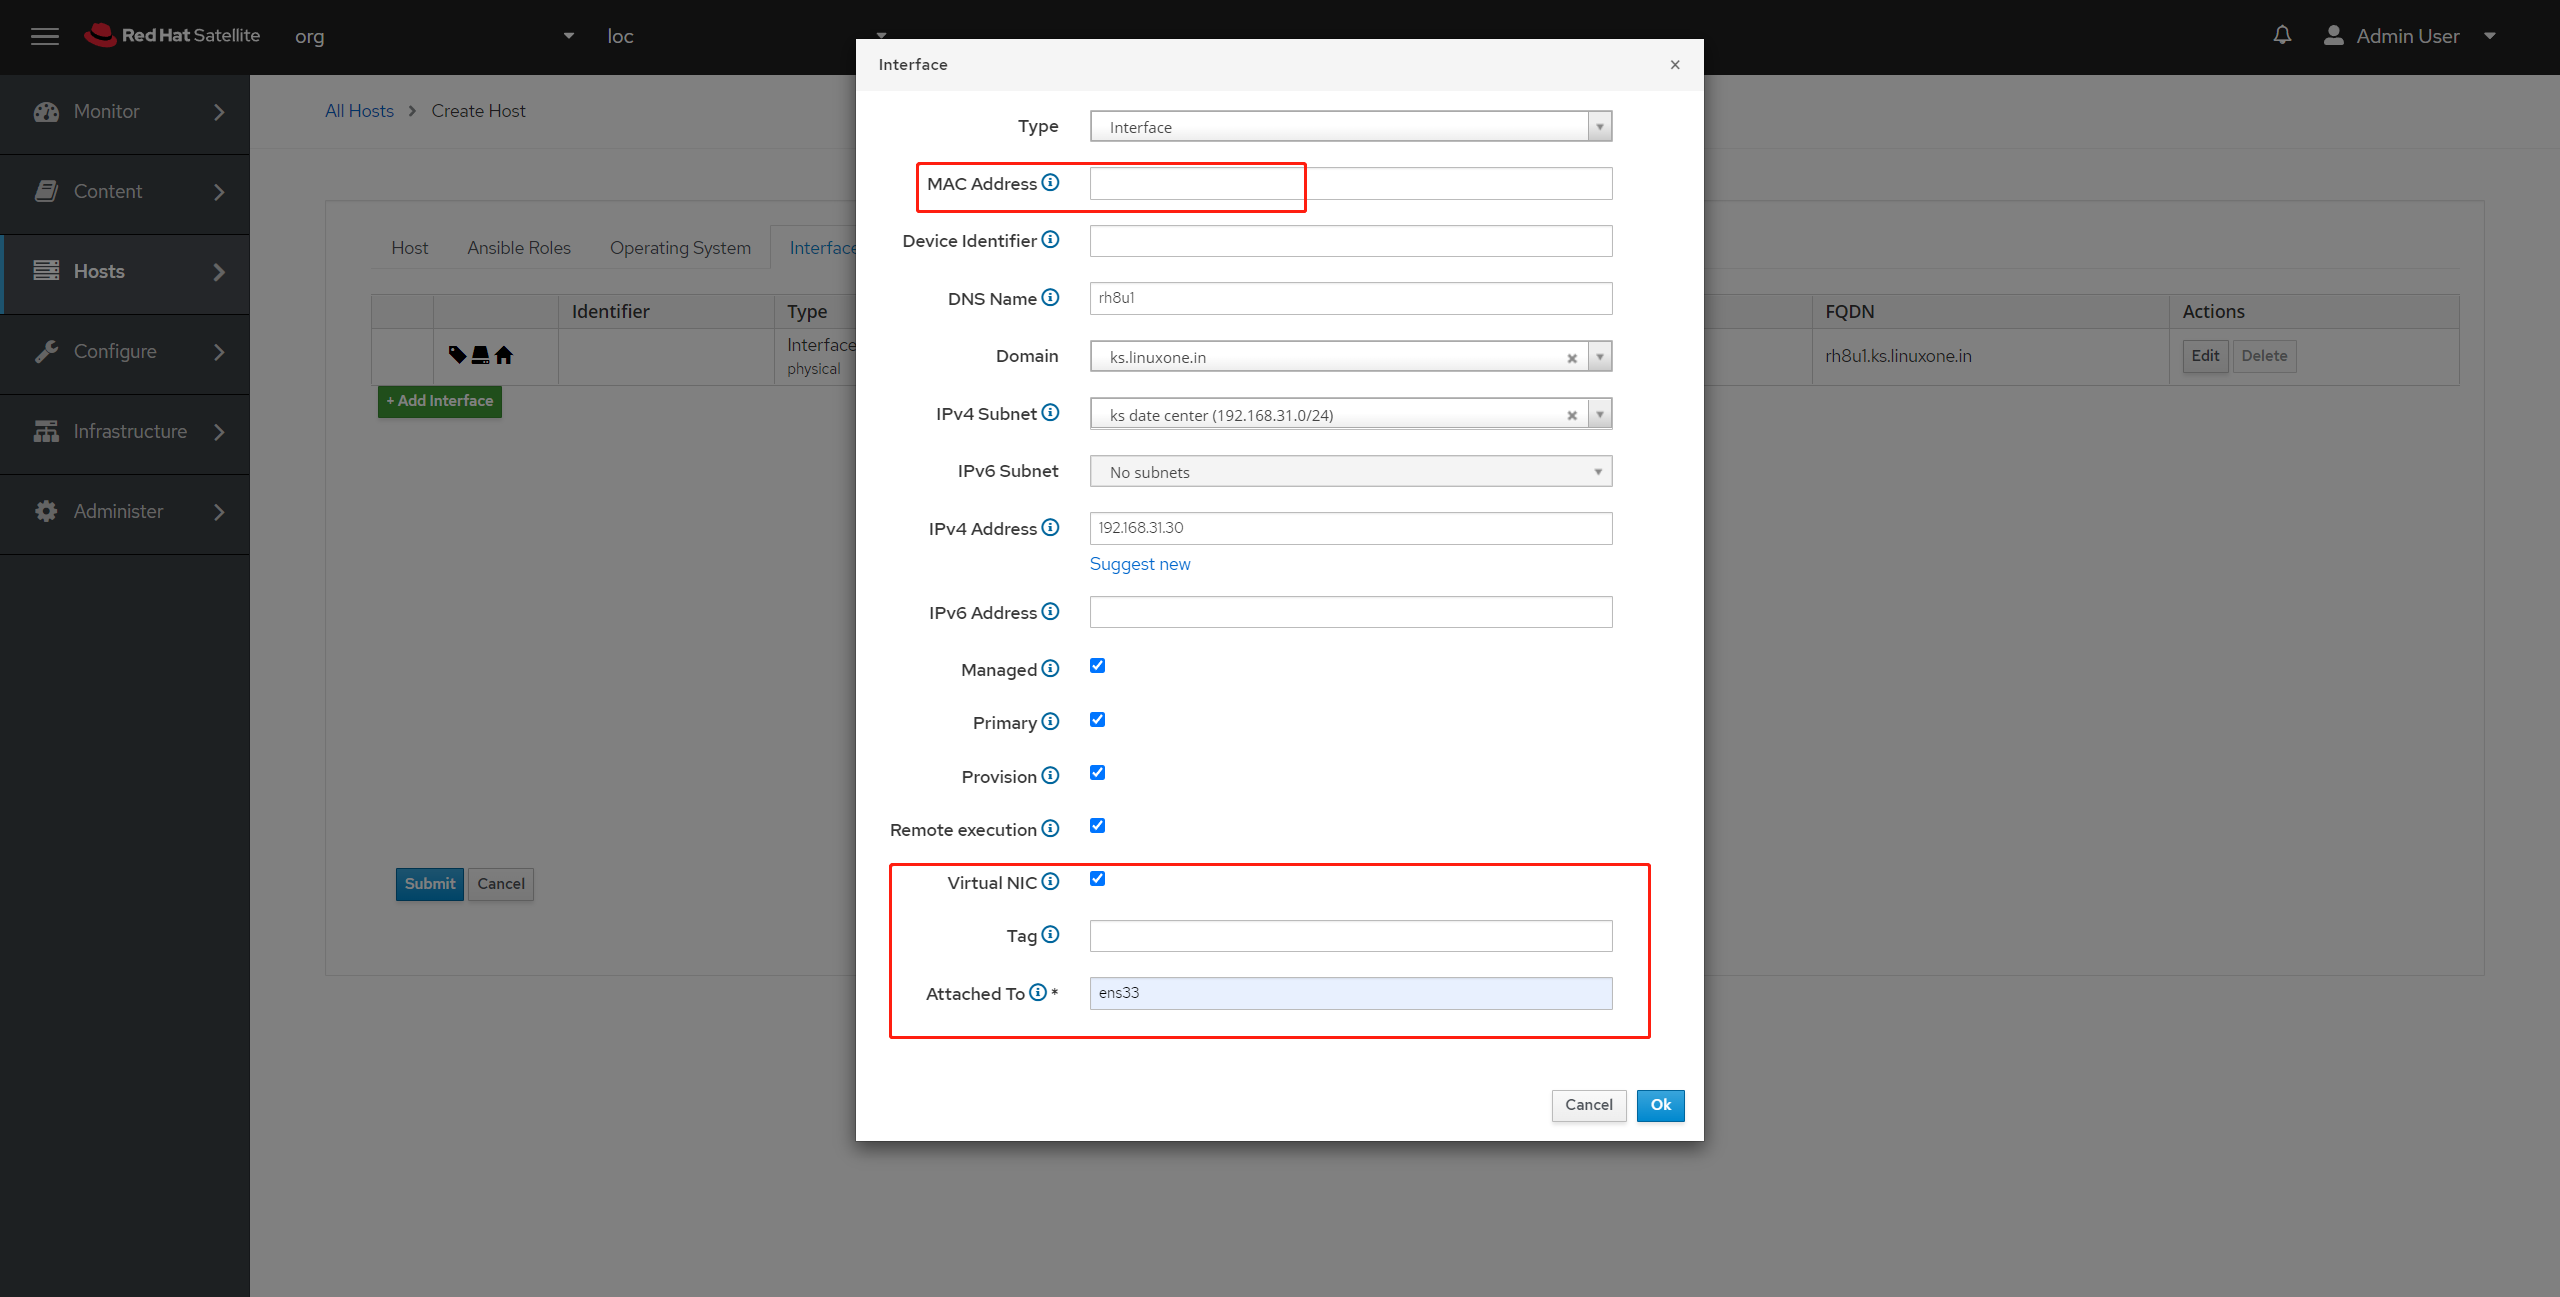
- 其中 mac address 填写网卡 mac 地址,我使用的 vmware 虚拟机,则额外勾选 virtual NIC
- 11.4 配置完成,点击
submit提交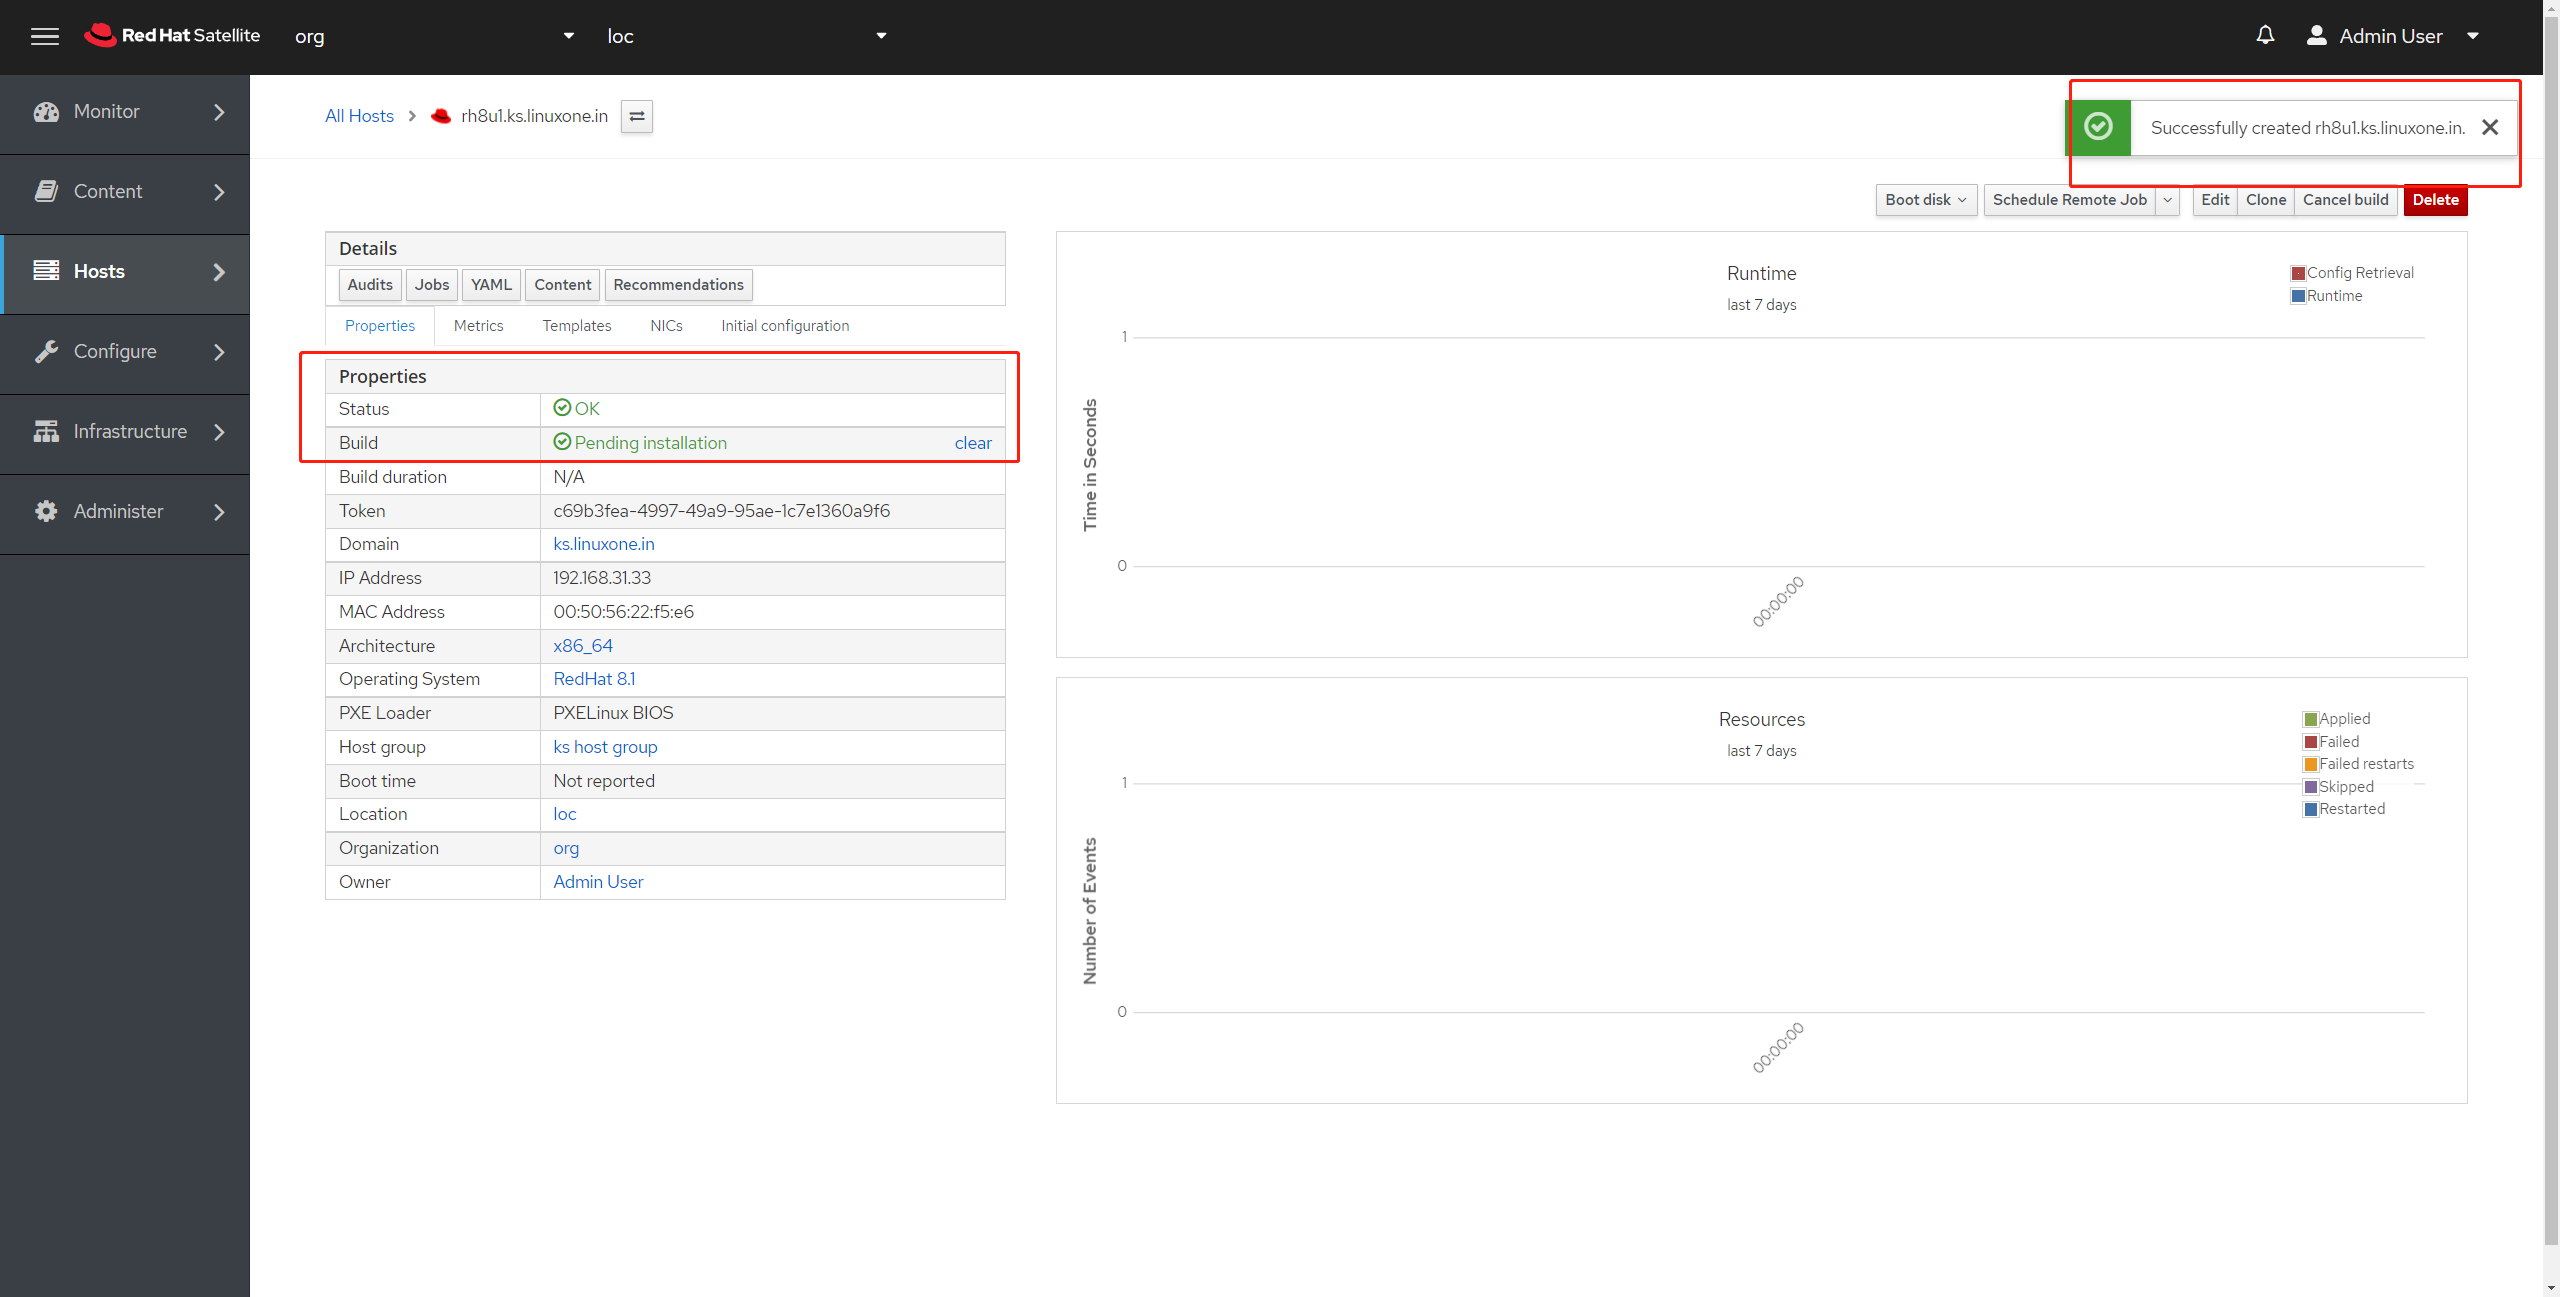
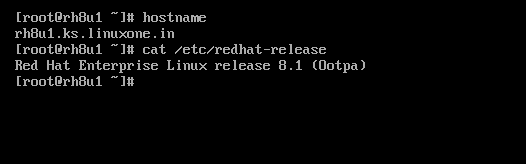
- 11.5 Vmware 启动虚拟机进行 pxe 自动安装
- 11.6 安装完成,检查 hostname 与 redhat-release